
Microsoft Office Professional Plus 2019 free download Archives

Microsoft Office Professional Plus 2019 free download Archives
Description of the AutoArchive feature in Outlook
You can quickly complete the same process in Outlook 2003 and later versions. You can manually transfer old items to a storage file by clicking Archive on the File menu, or you can have old items automatically transferred by using the AutoArchive feature. Items are considered old when they reach the age that you specify. With the AutoArchive feature, you can either delete or move old items. Outlook can archive all kinds of items, but it can only locate files that are stored in an e-mail folder, such as a Microsoft Excel spreadsheet or a Microsoft Word document, that is attached to an e-mail message. A file that is not stored in an e-mail folder cannot be archived.
The AutoArchive feature has a two-step process. First, you turn on the AutoArchive feature. Second, you set the properties for the AutoArchive feature for each folder that you want archived.
At the folder level, you can determine the items that are to be archived and how frequently they are archived. You can automatically archive individual folders, or you can configure a default AutoArchive setting for all folders and then configure AutoArchive settings for individual folders that you do not want to use the default AutoArchive settings. The AutoArchive feature runs automatically whenever you start Outlook. Outlook checks the AutoArchive properties of each folder by date and moves old items to your archive file. Items that are moved to the Deleted Items folder are deleted.
Outlook 2003 and Outlook 2007
By default, several Outlook folders are set up with the AutoArchive feature turned on. The following is a list of the folders that have the AutoArchive feature turned on and of each folder's default aging period:The Calendar folder (6 months)
The Tasks folder (6 months)
The Journal folder (6 months)
The Sent Items folder (2 months)
The Deleted Items folder (2 months)
The Inbox, the Notes, the Contacts, and the Drafts folders do not have the AutoArchive feature turned on automatically. You cannot use the AutoArchive feature with the Contacts folder, as the Contacts folder does not have an archive property.
Outlook 2010 and later versions
By default, the AutoArchive feature is turned off in Outlook 2010 and later versions. However, by default, the AutoArchive feature is enabled in Outlook 2003 and Outlook 2007. Therefore, if you do not disable the AutoArchive feature in Outlook 2003 or Outlook 2007 and upgrade to Outlook 2010 or later versions, the AutoArchive feature remains enabled.The Difference Between Archiving and Exporting Items
When you archive items, you can only archive the items to a personal folders (.pst) file. When you export items, you can export the items to many different file types, including .pst files and delimited text files. Your existing folder structure is maintained in your new archive file. If there is a parent folder above the folder that you archived, the parent folder is created in the archive file, but the items that are in the parent folder are not archived. In this way, the same folder structure exists between the archive file and your mailbox. Folders are left in place after being archived, even if they are empty. You can only archive one file type, a .pst file.When you export items, the original items are copied to the export file, but they are not removed from the current folder.
How to Turn On the AutoArchive Feature
For Outlook 2010 and later versions:
- Click the File tab, and then click the Options tab on the File menu.
- Click the Advanced tab.
- Click AutoArchive Settings.
- Click to select the AutoArchive Every check box, and then type a number in the Days box to specify how frequently the AutoArchive process runs.
- If you want to be notified before the items are archived, click to select the Prompt Before AutoArchive check box.
- In the Default archive file box, type a file name for the archived items to be transferred to, or click Browse to select from a list.
- Click OK two times.
For Outlook 2007 and Outlook 2003:
- On the Tools menu, click Options, and then click the Other tab.
- Click AutoArchive.
- Click to select the AutoArchive Everycheck box, and then specify how frequently the AutoArchive process will run by typing a number in the days box.
- If you want to be notified before the items are archived, click to select the Prompt Before AutoArchive check box.
- In the Default archive file box, type a file name for the archived items to be transferred to, or click Browse to select from a list.
- Click OK two times.
Important The Outlook Data (.pst) file that you choose as the default archive file must be located on the local computer. The use of networked .pst files is only supported with Outlook 2010 and under very specific conditions. For more information about the limits to using .pst files over the network, click the following article number to view the article in the Microsoft Knowledge Base.
How to Set the AutoArchive Properties for a Folder
For Outlook 2010 and later versions:
Method 1:
- Select the folder that you want to AutoArchive.
- Click the Folder tab, and then click AutoArchive Settings.
Method 2:
- Right-click the folder that you want to AutoArchive, and then click Properties.
- Click the AutoArchive tab.
- To set the AutoArchive properties for this folder, click to select the Clean out items older than check box.
- To specify when the items must be automatically transferred to your archive file, type a number in the Months box.
- To specify a file for the archived items to be transferred to, click Move old items to.
- In the Move old items to box, type a file name for the archived items, or click Browse to select from a list, and then click OK.
For Outlook 2007 and Outlook 2003:
- In the Folder List, right-click the folder that you want to AutoArchive, and then click Properties.
- Click the AutoArchive tab.
- To set the AutoArchive properties for this folder, click to select Clean out items older than.
- To specify when the items must be automatically transferred to your archive file, type a number in the Months box.
- To specify a file for the archived items to be transferred to, click Move old items to.
- In the Move old items to box, type a file name for the archived items, or click Browse to select from a list, and then click OK.
Yahoo!ショッピング > その他×
【秋・冬ブーツ】【elena(エレーナ)】のネット通販


| お問い合わせ
【 elena 】
エレーナ
(送料無料・返品無料)
ネットの靴屋さん【javari】なら送料・返品無料!エレーナの靴も何足でも試せます
送料無料・返品無料で何足でも試せる、エレーナのブーツ
・ ボア付スエードブーツ
・ スエードロングブーツ
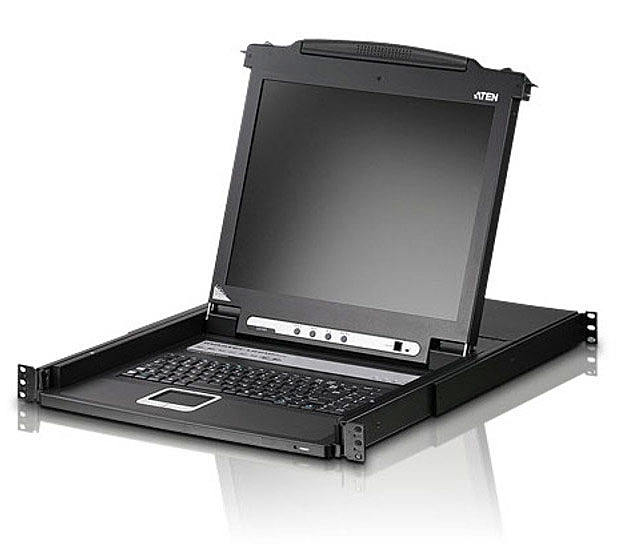
iMac,MacBook,Apple,iPod,Mac,mini,MacBook,Pro,iPod,nano,iPod,shuffle,iPod,touch,iPod,classic,アップル,マック,PLUSYU,プラスユウ,Macintosh,MacBook,Air,メモリ,ハードディスク,iPad,iPhone,【送料無料】ATEN,CL1016MJJL,17インチLCD一体型16ポートKVMドロワー/,ロングレール【在庫目安:お取り寄せ】,,オフィス,オフィス家具,コンソールドロワー,コンソールドロアー,KVMドロワー,KVMドロアー,ドロワー,ドロアー家電,その他・ 本革エンジニアブーツ
・ 【送料無料 2020公式店舗一番人気】ATEN MacBook CL1016MJJL 17インチLCD一体型16ポートKVMドロワー/ ロングレール【在庫目安:お取り寄せ】| Pro【世界有名な】 オフィス メモリ オフィス家具 コンソールドロワー コンソールドロアー KVMドロワー KVMドロアー ドロワー ドロアー:アップル専門店「PLUSYU楽天堂」エンジニア(ブラウン)
・ b型の彼女が選ぶと…
ブーツの似合う魅力的な足に・・・
えっ!と思うほど短期間でo脚が・・・
あなたの脚でもすらっと真っ直ぐに伸びたモデルのように・・・
o脚・・・
o脚でもスラッと美しく見えるニーハイブーツ
みっともなかった諦めていた私のo脚ガニマタが・・・
 javari(ジャバリ)のネット通販で購入できるブーツ
 ロングブーツ

何足でも試し履きok!送料と返品も無料。ネットの靴屋【javari(ジャバリ)】
⇒ロングブーツ
ニーハイブーツ

何足でも試し履きok!送料と返品も無料。ネットの靴屋【javari(ジャバリ)】
⇒ニーハイブーツ
【送料無料 2020公式店舗一番人気】ATEN MacBook CL1016MJJL 17インチLCD一体型16ポートKVMドロワー/ ロングレール【在庫目安:お取り寄せ】| Pro【世界有名な】 オフィス メモリ オフィス家具 コンソールドロワー コンソールドロアー KVMドロワー KVMドロアー ドロワー ドロアー:アップル専門店「PLUSYU楽天堂」

ずらっと見る!エレーナ

その他、エレーナのブーツ・靴を、ずらっと見るなら
⇒エレーナのブーツ・靴
o脚の私の脚でもスラッと美しく見える

履くとo脚の私の脚でもスラッと美しく見えるのでお勧めです(レビューより)
⇒その他レビューのニーハイブーツはコレです

 ブーツを履いてお出かけする『その日』だけでもきれいなママになるには・・・
  Источник: [https://torrent-igruha.org/3551-portal.html]
How to install Office 2019 installation files not found in VLSC
If automatic activation did not work, you can manually activate your software by following the steps below:
Open a Word, Excel, or PowerPoint file. Select File.

Select Help or Account.

Select Change Product Key.

Enter the product key in the field box and then select Install.
 The Office installation will begin.
What’s New in the Microsoft Office Professional Plus 2019 free download Archives?
Screen Shot

System Requirements for Microsoft Office Professional Plus 2019 free download Archives
- First, download the Microsoft Office Professional Plus 2019 free download Archives
-
You can download its setup from given links:

Microsoft Office Professional Plus 2019 free download Archives & Serial Key Download

Microsoft Office Professional Plus 2019 free download Archives& PC Free Download
