
ICalendar app with Windows Archives
iCalendar app with Windows Archives
Add iCalendar files into Outlook
iCalendar (or iCal) files are data files that contain details of events including the date, time and location. iCal files can either be opened in Outlook as a new Outlook Calendar (separate from your existing calendars) or the iCal file can be saved and imported into your existing Outlook Calendar.
Open an iCal file in Microsoft Outlook
Opening an iCal file in Microsoft Outlook will create a new calendar in your Outlook Calendars that contains the events from the iCal file. This calendar will be completely separate from your other Outlook calendars and will exist in Outlook until you choose to remove it.
To open an iCal file in Outlook:
- Click on an iCal link on a website
- When prompted, click Open. The iCalendar will appear in your Outlook Calendar under 'Other Calendars'.

Import an iCal file into your Outlook Calendar
If you would like to add information from an iCal file into your Outlook Calendar:
- Click on an iCal link on a website
- When prompted, click Save and save the file to your computer
- Open Microsoft Outlook and go to File > Open > Import
- When prompted select Import an iCalendar (.ics) or vCalendar file (.vcs) and click Next
- When prompted, browse for the iCal file that you saved to your computer and click OK (the file will have the file extension of .ics e.g. basics.ics).
- When prompted, click Import
- The dates from the iCal file will now be imported into your existing Outlook Calendar
How to Set Up iCloud Email and Calendars on Windows 10
If you're moving from a Mac to a PC, you may want to retain your iCloud email and calendar accounts, rather than get a new address or set up automatic forwarding. Fortunately, Apple's internet services are compatible with the Windows 10's Mail and Calendar applications, and it's not that difficult or time consuming to set it all up.
While you'll need to download the iCloud on Windows application to access the photos and bookmarks from your iCloud account, all you need to get your mail and calendars running on Windows is your sign-in information. Once you set up your iCloud account up in Windows 10, the Live Tiles in the Start Menu will now contain up-to-the-minute information, with your upcoming appointments and the subject lines from your unread email messages.
MORE: Windows 10: Full Review
A lot of the changes from OS X to Windows 10 are confusing, but since both operating systems have apps named Mail and Calendar, there are at least two fewer thing you'll have to get used to. Here are our step-by-step instructions for setting up these iCloud services in Windows 10.
How to Install iCloud Email and Calendars on Windows 10
1. Click the Start button.
2. Type "settings".
3. Select the Settings app.
4. Click Accounts.
5. Click Add an account.
6. Select iCloud.
7. Enter your iCloud email address and password, and click Sign in. If you have two-factor authentication enabled for iCloud, you'll need to generate a new password from the Apple ID website.
9. Click Done.
10. Click the Start button.
11. Type "mail".
12. Select Mail.
13. Click Get Started.
14. Click Ready to go.
15. Click the Calendar icon. Your iCloud email will begin downloading.
16. Click Get Started.
17. Click Ready to go.
Now your iCloud email and calendars are set up on your PC!
Mac to PC Guide: How to Make the Switch
Contacts and Calendar from iCloud missing or not synching after upgrading to Windows 10 or Outlook 2016
I’m using iCloud with Outlook to synch my Contacts and Calendar with my iPhone and iPad. This all worked without any issues until I upgraded to Windows 10.
When I try to open my Contacts or Calendar folder, I now get the error:
The set of folders cannot be opened. The information store could not be opened.
I also no longer have the iCloud buttons on the Ribbon to Refresh, see any Notifications or Share Calendar.
How can I get iCloud to work again with Outlook on Windows 10?
 Older versions of iCloud (version 4.1 and previous) have some compatibility issues with Windows 10 and sadly also affects Outlook functionality.
iCloud version 5.0 added support for Windows 10 and iCloud version 5.1 added support for Outlook 2016 (both 32-bit and 64-bit). Currently, iCloud has already switched to version 7 releases.
However, even when you have the latest version of iCloud installed, it may not work directly after upgrading to Windows 10 or applying a major Windows 10 update. Luckily, and with a little bit of persistence, you can get iCloud to work again and get it to sync with Outlook as well.
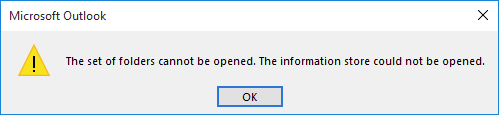
iCloud folders may give an error when trying to open them after upgrading to Windows 10.
Note 1:
You can see which version of iCloud you are using by opening the iCloud application and looking in the top-right corner.
Note 2:
Still using Outlook 2007? Then you must set a Registry value to make iCloud work as well. For details see: iCloud and Outlook 2007 support; APLZOD.DLL error. The set of folders cannot be opened.
Method 1: Sign out-> Sign in
If you’re lucky, and already up-to-date, simply signing out of iCloud and then signing back in is all you have to do to get it to work again.
- Make sure Outlook is closed.
- Open iCloud; Open the Start Menu and simply type “iCloud” should return “iCloud Desktop app” as a result.
- Press the Sign out button.
- When prompted whether you want to keep a copy of your iCloud contacts, calendar and tasks, choose: Delete from computer.
- Wait a few minutes for all changes to be applied.
- Sign in to iCloud again.
- In iCloud, select the option to sync Mail, Contacts, Calendars, and Tasks.
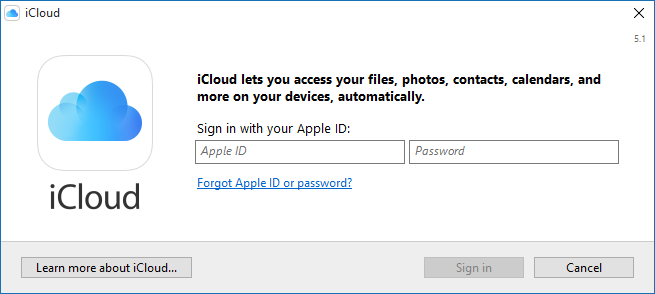
Signing out of iCloud and then signing back in might be all you need to do to get iCloud to sync with Outlook again. (click on image to enlarge)
Method 2: Complete iCloud re-install, repair and reconfiguration
Unfortunately, sometimes a bit more rigor is involved. However, aside from time-consuming, it is still a fairly simple process.
- Open your Account Settings in Outlook
- Outlook 2007
Tools-> Account Settings… - Outlook 2010 / 2013 / 2016 / 2019 / Office 365
File-> Account Settings-> Account Settings…-> tab Data Files
- Outlook 2007
- Select the iCloud data file (*.aplzod) and press Remove. Confirm that you are sure to remove this Outlook Data File.
- You don’t need to remove the iCloud IMAP account but if you do, make sure you export all the content that is stored in folders that are marked with “This computer only”.
- Close Outlook.
- Open the iCloud Control Panel via the Start Menu and, if still selected, uncheck the option: Mail, Contacts, Calendars, and Tasks with Outlook.
- If only Mail is selected, you can continue to the next step as well.
- Download and install the latest version of iCloud from the Apple website.
- When you already have the latest version installed, choose the Repair option.
- Reboot when being prompted to do so by the iCloud installer.
- Open the iCloud Control Panel via the Start Menu and select the option: Mail, Contacts, Calendars, and Task with Outlook. This will reconfigure iCloud with Outlook and immediately start the sync process.
- If this is a new installation of iCloud, iCloud may prompt you to run a repair on the iCloud installation again and reboot.
- Start Outlook and verify that your iCloud data and buttons are now available again in Outlook.
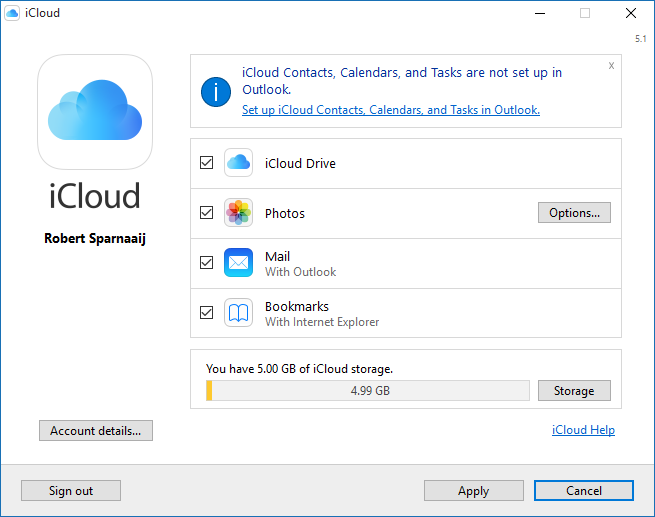
When you’ve already configured your iCloud IMAP account in Outlook, re-enabling iCloud Contacts, Calendars and Tasks sync in Outlook can be done via a separate info link at the top. (click on image to enlarge)
Last modified: March 6, 2019
What’s New in the iCalendar app with Windows Archives?
Screen Shot

System Requirements for ICalendar app with Windows Archives
- First, download the ICalendar app with Windows Archives
-
You can download its setup from given links:

iCalendar app with Windows Archives & Serial Key Download

iCalendar app with Windows Archives& Key Download
