
IOS Emulators Vs iOS Simulators Archives

iOS Emulators Vs iOS Simulators Archives
How to run iOS app on another Mac's iOS Simulator
How to Archive for iOS simulator?
Usually you won't archive iOS app for simulator use, unless... your client suddenly tell you that his iPhone is broken and undergoing repair, but hey he has a Mac that can run Xcode and also iOS simulator and he still want to test your app! Of course you wouldn't want to send the full source code over before client paid you in full. So how do you send him the build to test without sending the source code over?
As per Apple documentation,
Applications built for the simulator cannot be archived
Fortunately, there's a way to send the compiled build so your client can run the compiled build without him having to build from the source code.
Update (October 2018)
honeyeeb mentioned a faster way that we can use the compiled app in the 'Products' folder, send this to colleague/client and ask them to drag and drop it into iOS Simulator.
After building the app, go to the left side navigator bar, select Products > appName.app, right click it and select 'Show in Finder'.

Finder will show the .app file and you can send the file to your colleague / client.
Thanks for the suggestion honeyeeb! 😆
1. Locate your iOS Simulator folder in Finder
Open terminal, and run , you will see a list of simulator device and their UDID inside square brackets.

I will be using iPhone SE (iOS 11.2) as the selected simulator device for this tutorial, the corresponding UDID for it is "18BF1A2D-15C2-40E2-80A6-0CB87D2B56D4".
The folder containing the simulator data will be located at
.
In Finder, press + + , and enter the path.

2. Build your app and locate its data folder
Before building your app, I recommend deleting all other existing app you have built previously on the simulator so that you can find your app data folder easier in the next step.
Proceed to build your app as usual in Xcode, my app name is "exampleApp" for this tutorial.
After building, open Finder and proceed to the simulator folder path
In your simulator folder, locate to , here you will see the folder for the apps you have built in the simulator.

To find the folder containing your app, you have to open one by one until you found your app name inside, like this :

Compress the app and send the zip file to your client.

For easier instruction, ask your client to unzip the compressed file at Desktop folder.
3. Instruction for clients
Below are the instruction for clients:
Open Xcode, then start iOS Simulator by choosing Xcode > Open Developer Tool > Simulator.

In Simulator, select the device you want.

Simply drag and drop the app file into the Simulator :
The app should install on the simulator successfully, rejoice!
Send this link to your client for reference if needed : https://fluffy.es/how-to-archive-ios-app-for-simulator/#client
If you want to understand Auto Layout fundamentally (instead of just following youtube tutorials implementing a very specific layout which might not apply to your app), check out my book Making Sense of Auto Layout, with practical case study!

“dude… wow… good job on this Auto Layout book! One of the best explanations I’ve read!” – Alex Kluew
iOS Platform Guide
This guide shows how to set up your SDK development environment to deploy Cordova apps for iOS devices such as iPhone and iPad, and how to optionally use iOS-centered command-line tools in your development workflow. You need to install the SDK tools regardless of whether you want to use these platform-centered shell tools or cross-platform Cordova CLI for development. For a comparison of the two development paths, see the Overview. For details on the CLI, see Cordova CLI Reference.
Requirements and Support
Apple® tools required to build iOS applications only run on the OS X operating system on Intel-based Macs. Xcode® 8.0 (the minimum required version) runs only on OS X version 10.11.5 (El Capitan) or greater, and includes the iOS 10 SDK (Software Development Kit). To submit apps to the Apple App Store℠ requires the latest versions of the Apple tools.
You can test many of the Cordova features using the iOS simulator installed with the iOS SDK and Xcode, but you need an actual device to fully test all of the app's device features before submitting to the App Store. The device must have at least iOS 9 installed, the minimum iOS version supported since the release of cordova-ios v4.4.0.
Installing the Requirements
Xcode
There are two ways to download Xcode:
from the App Store, available by searching for "Xcode" in the App Store application.
from Apple Developer Downloads, which requires registration as an Apple Developer.
Once Xcode is installed, several command-line tools need to be enabled for Cordova to run. From the command line, run:
Deployment Tools
The ios-deploy tools allow you to launch iOS apps on an iOS Device from the command-line.
To install it, run the following from command-line terminal:
Project Configuration
Installing Xcode will mostly set everything needed to get started with the native side of things. You should now be able to create and build a cordova project. For more details on installing and using the CLI, refer to Create your first app guide.
Deploying to Simulator
To preview the app in the iOS simulator:
Open the workspace file () from Xcode, or from the command line:
Make sure the project is selected in the left panel (1).
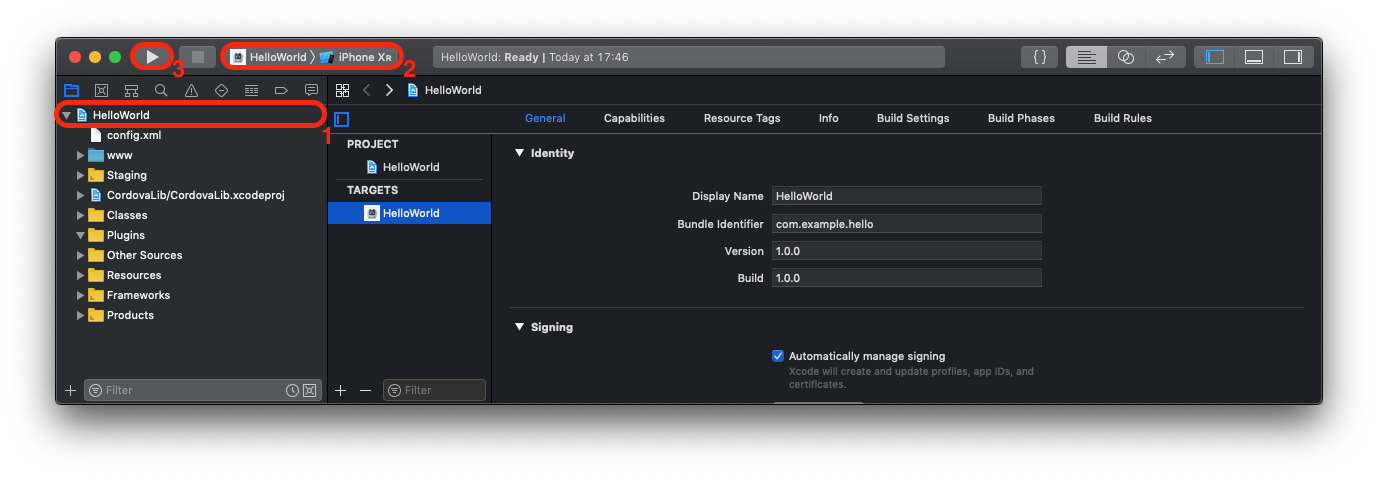
Select the intended device from the toolbar's Scheme menu, such as the iPhone XR Simulator as highlighted in (2)
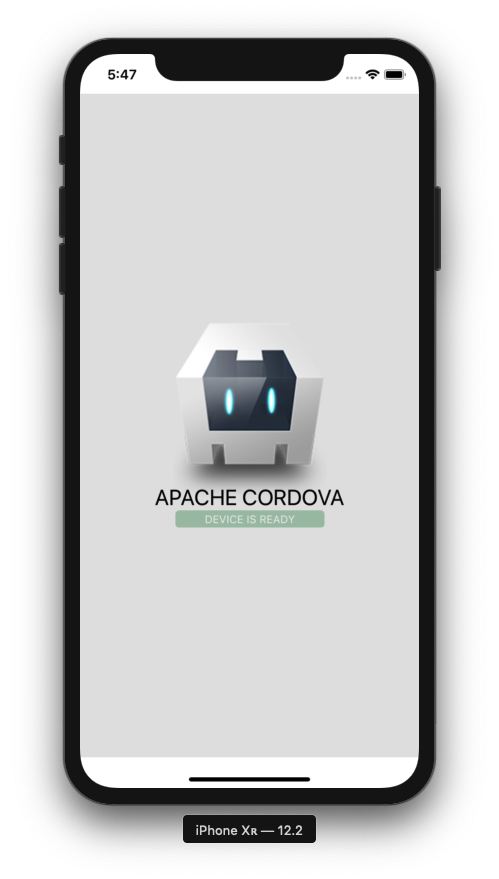
Press the Run button (3) in the same toolbar to the left of the Scheme. That builds, deploys, and runs the application in the simulator. A separate simulator application opens to display the app:
Only one simulator may run at a time, so if you want to test the app in a different simulator, you need to quit the simulator application and run a different target within Xcode.
Xcode comes bundled with simulators for the latest versions of iPhone and iPad. Older versions may be available from the Xcode → Preferences... → Components panel.
Deploying to Device
For details about various requirements to deploy to a device, refer to the Launch Your App On Devices section of Apple's About App Distribution Workflows. Briefly, you need to do the following before deploying:
Create a Provisioning Profile within the iOS Provisioning Portal. You can use its Development Provisioning Assistant to create and install the profile and certificate Xcode requires.
Verify that the Code Signing Identity setting within the Code Signing section within the build settings is set to your provisioning profile name.
To deploy to the device:
Use the USB cable to plug the device into your Mac.
Select the name of the project in the Xcode window's Scheme drop-down list.
Select your device from the Device drop-down list. If it is plugged in via USB but still does not appear, press the Organizer button to resolve any errors.
Press the Run button to build, deploy and run the application on your device.
Signing an App
First, you should read through the Code Signing Support Page and the App Distribution Workflows.
Using Flags
To sign an app, you need the following parameters:
| Parameter | Flag | Description |
|---|---|---|
| Code Sign Identity | Code signing identity to use for signing. It can be created with Xcode and added to your keychain. Starting with Xcode 8 you should use both for and . | |
| Development Team | The development team (Team ID) to use for code signing. You would use this setting and a simplified Code Sign Identity (i.e. just 'iPhone Developer') to sign your apps, you do not need to provide a Provisioning Profile. | |
| Packaging Type | This will determine what type of build is generated by Xcode. Valid options are (the default), , , and . | |
| Provisioning Profile | (Optional) GUID of the provisioning profile to be used for manual signing. It is copied here on your Mac: . Opening it in a text editor, you can find the GUID which needs to be specified here if using manual signing. | |
| Code Sign Resource Rules | (Optional) Used to control which files in a bundle should be sealed by a code signature. For more details, read The OS X Code Signing In Depth article | |
| Automatic Provisioning | (Optional) Enable to allow Xcode to automatically manage provisioning profiles. Valid options are (the default) and . |
Using build.json
Alternatively, you could specify them in a build configuration file () using the argument to the same commands. Here's a sample of a build configuration file:
For automatic signing, where provisioning profiles are managed automatically by Xcode (recommended):
For manual signing, specifying the provisioning profiles by UUID:
Xcode Build Flags
If you have a custom situation where you need to pass additional build flags to Xcode you would use one or more options to pass these flags to . If you use an built-in flag, it will show a warning.
You can also specify a option in above (the value for the key is a string or an array of strings).
Debugging
For details on the debugging tools that come with Xcode, see this article and this video.
Open a Project within Xcode
Cordova for iOS projects can be opened in Xcode. This can be useful if you wish to use Xcode built in debugging/profiling tools or if you are developing iOS plugins. Please note that when opening your project in Xcode, it is recommended that you do NOT edit your code in the IDE. This will edit the code in the folder of your project (not ), and changes are liable to be overwritten. Instead, edit the folder and copy over your changes by running .
Plugin developers wishing to edit their native code in the IDE should use the flag when adding their plugin to the project via cordova plugin add. This will link the files so that changes to the plugin files in the platforms folder are reflected in your plugin's source folder (and vice versa).
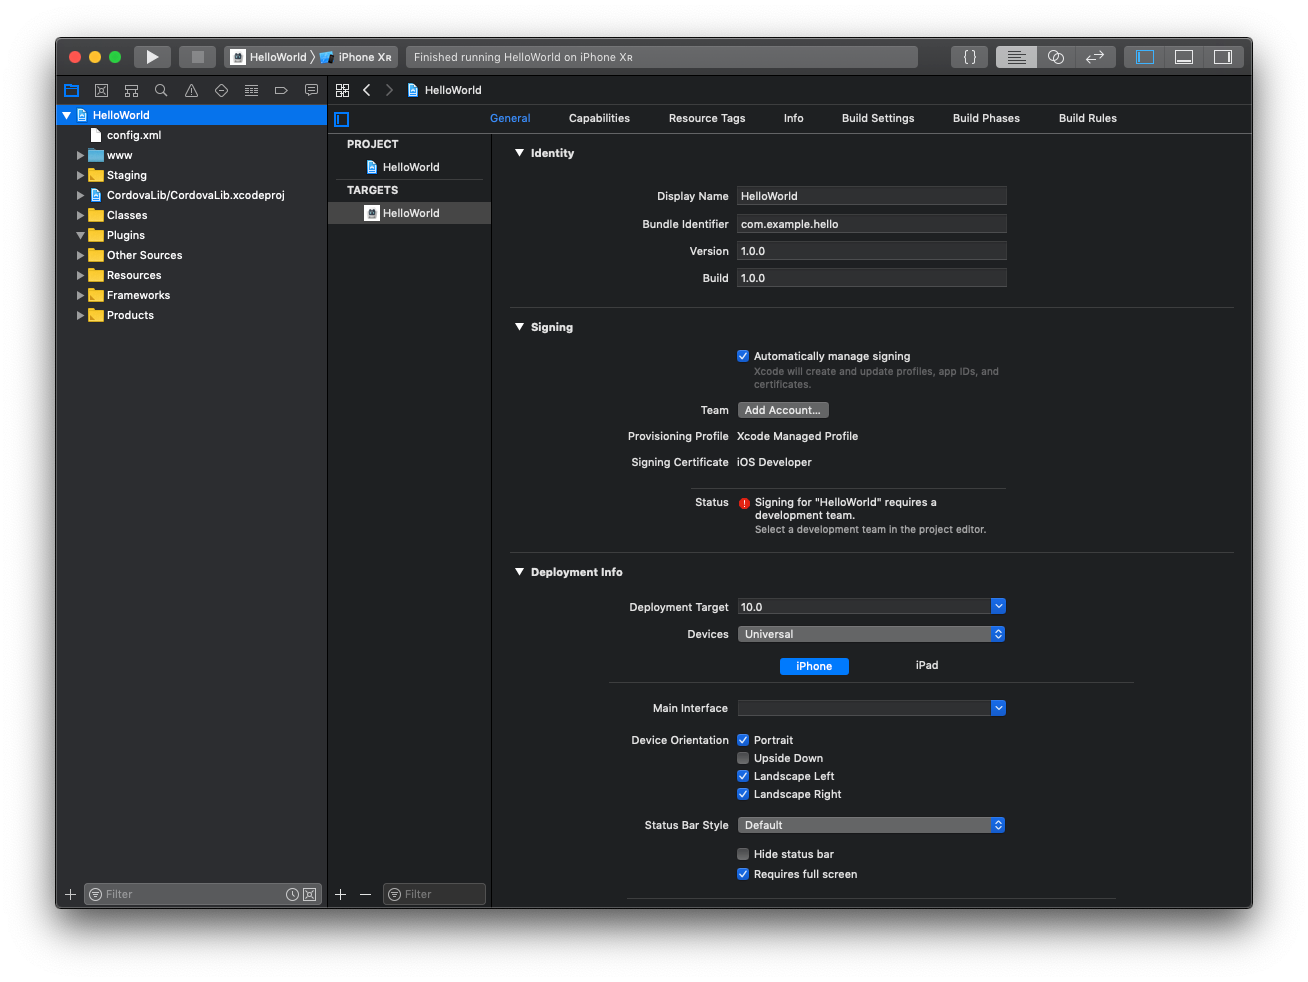
Once the ios platform is added to your project and built using , you can open it from within Xcode. Double-click to open the file or open Xcode from your terminal:
The screen should look like this:
Platform Centered Workflow
cordova-ios includes a number of scripts that allow the platform to be used without the full Cordova CLI. This development path may offer you a greater range of development options in certain situations than the cross-platform cordova CLI. For example, you need to use shell tools when deploying a custom Cordova WebView alongside native components. Before using this development path, you must still configure the SDK environment as described in Requirements and Support above.
For each of the scripts discussed below, refer to Cordova CLI Reference for more information on their arguments and usage. Each script has a name that matches the corresponding CLI command. For example, is equivalent to .
To get started, either download the cordova-ios package from npm or Github.
To create a project using this package, run the script in the folder:
To run the app, use the script in the folder:
The created project will have a folder named inside that contains scripts for the project-specific Cordova commands (e.g. , , etc.).
To install plugins in this project, use the Cordova Plugman Utility.
Upgrading
Refer to this article for instructions to upgrade your version.
(Mac®, OS X®, Apple®, Xcode®, App Store℠, iPad®, iPhone®, iPod® and Finder® are Trademarks of Apple Inc.)
.ipa
An .ipa (iOS App Store Package) file is an iOS application archive file which stores an iOS app. Each .ipa file includes a binary and can only be installed on an iOS device. Files with the .ipa extension can be uncompressed by changing the extension to .zip and unzipping.
Most .ipa files cannot be installed on the iPhone Simulator because they do not contain a binary for the x86 architecture, only one for the ARM architecture of mobile phones.[1] To run applications on the simulator, original project files which can be opened using the XcodeSDK are required. However, some .ipa files can be opened on the simulator by extracting and copying over the .app file found in the Payload folder. Some simple apps are able to run on the simulator through this method.
ipa is a de facto format used by Apple and there are no specifications of it. A form of Digital Rights Management exists in the format to control redistribution to a single Apple ID.[2] Prior to iTunes 12.7 (September 2017), users had direct access to ipa files in the form of App Store downloads.[3]
Structure of a .ipa file[edit]
An IPA has a built-in structure for iTunes and App Store to recognize. The example below shows the structure of an IPA:[4]
/Payload/ /Payload/Application.app/ /iTunesArtwork /iTunesArtwork@2x /iTunesMetadata.plist /WatchKitSupport/WK /META-INFAs shown above, the Payload folder is what contains all the app data. The iTunes Artwork file is a 512×512 pixel PNG image, containing the app's icon for showing in iTunes and the App Store app on the iPad. The iTunesMetadata.plist contains various bits of information, ranging from the developer's name and ID, the bundle identifier, copyright information, genre, the name of the app, release date, purchase date, etc.
It is common but undocumented to use a JPEG file for iTunesArtwork.[5]
Since 2017, Apple has used LZFSE instead of registered Zip algorithms in IPAs. The "compression method" field in this case is set to 99.[6]
Code signing is handled in the .app bundle directory. The META-INF folder only contains metadata about what program was used to create the IPA.[7]
Unsigned .ipa executables[edit]
An unsigned .ipa can be created by copying the folder with the extension .app from the Products folder of the application in Xcode to a folder called Payload and compressing the latter using the command .
It is then possible to install unsigned .ipa files on iOS jailbroken devices using third party software. AppSync is the tool for installing such homebrew apps. Similar to the case of game console hacking, people are known to use this installation for piracy, against the tool developer's wishes:[8] some underground communities form around buying an app and then sharing its DRM-free unsigned version.
References[edit]
What’s New in the iOS Emulators Vs iOS Simulators Archives?
Screen Shot

System Requirements for IOS Emulators Vs iOS Simulators Archives
- First, download the IOS Emulators Vs iOS Simulators Archives
-
You can download its setup from given links:

iOS Emulators Vs iOS Simulators Archives & Software

iOS Emulators Vs iOS Simulators Archives& Free Download
