
IZotope VocalSynth 2 Serial Key Archives

iZotope VocalSynth 2 Serial Key Archives
4ny.netlify.com
- DESCARGAR IZOTOPE OZONE 4 + KEYGEN DESCARGAR IZOTOPE.iZotope Ozone 6 Advanced Full Crack. IZotope Ozone 6 is mastering. Master elegant. IZotope Ozone 6 Advanced is. 15.22 Full Keygen; Awesome Miner 4.7.3.iZotope Ozone 8 Torrent with Full Crack. IZotope Ozone Keygen:. Safe time and Get a perfect master of ozone 8 master system.
- Jan 09, 2020 iZotope VocalSynth 2 Crack With Keygen New Software. IZotope VocalSynth 2 Crack For Mac gives the user of this platform the edge over Windows users, because Windows version hasn’t even been released yet, but we are sure that it will follow suit. IZotope VocalSynth 2019 Crack: Explore the latest iconic vocal sounds with this advanced powerful.
May 26, 2019 How To IZotope Neutron Advanced Download: First Of All Download IZotope Neutron Advanced Crack With Keygen free from given links. Extract archive file then runs the setup file. Now use the Keygen for IZotope Neutron Advanced or Serial Key. OR use crack for IZotope Neutron Advanced permanent activation. Jan 28, 2020 Izotope ozone Crack is an incredible software that allows you to bring innovation in the audio tracks. It has easy to use interface that you can learn easily. There is no need for specific tutorials. Once you install the app you open the menu and understand about each tool. Oct 30, 2019 iZotope Ozone Advanced 8 Crack + Key Final Version 64+32-Bit IzoTope Ozone Crack a fantastic Music Creation application that is used in hands of Professional Music Composers, Playback Music Composers, All Musical Effects, All Updated Plug-Ins, Insert Loops, Create New Melodies & Vocal Assistant Support. IZotope Nectar 3.1.0.630 Full Version Crack Free Download iZotope Nectar 3.1.0.630 Crack Full is a powerful application designed to generate fully complemented vocals using fast and infinite correction tools. The IZotope Nectar Keygen automatically analyzes dynamics to detect and correct level discrepancies, identify hard variations of timbre variations, and intelligently adjust EQ to ensure. Jan 26, 2019 iZotope Ozone 9.02 Crack Plus Keygen For Mac + Windows Is Here. IZotope Ozone Torrent is amazing software that will bring your high-quality sound at your fingertips. The new version comes with high-quality tracks and advanced tools.

When you click the “ Download” link on this page, files will downloading directly in the owner sources (Official sites/Mirror Website). New latest virtual dj software free download full. Virtual DJ is definitely an windows app that created by Inc. We are not directly affiliated with them. The Virtual DJ for PC will functions normally on most current Windows operating systems (10/8.1/8/7/Vista/XP) 64 bit and 32 bit.DisclaimerThis Virtual DJ App installation file is completely not hosted on our Server. Clicking this link will start the installer to download Virtual DJ totally free for Laptop.Q: Is this Virtual DJ will work normally on any Windows?A: Yes!
Crack Keygen Software

↓↓
↓↓
iZotope VocalSynth 2 Crack With Keygen New Software
iZotope VocalSynth 2 Crack For Mac gives the user of this platform the edge over Windows users, because Windows version hasn’t even been released yet, but we are sure that it will follow suit. iZotope VocalSynth 2019 Crack: Explore the latest iconic vocal sounds with this advanced powerful application that lets you enhance electronic vocal textures, robot sounds, computerized harmonies with ease. iZotope VocalSynth 2 Free Download permits you to control your voice. It offers a full management over your sounds by adding a good vary of innovative effects. It is the cracked version of the software that will let you transform your voice to make it sound like anything you want it to be. You can turn your voice into a computerize sound, or make it sound like a robot. Users can customize their voice to make it very unique by changing pitch, this feature is also known as autotune effect, that can correct certain musical notes that the artist can’t reach.
iZotope VocalSynth 2 Keygen is principally designed to vocalists, singers, music creators, DJs, additionally as several different professionals. you’ll conjointly improve epic sound tracks. expertise the new usage of this restructure. Uncover a wild vocal treatment you’ve got ne’er expected. Surf throughout your libraries conjointly access all the sounds. Use numerous presets to unlock picture vocal sounds such as: hardware vocoders, classic talkbox, vintage pc voice chips, or formant and pitch-shifting effects.Ready for a transformative vocal experience? With VocalSynth, iconic vocal sounds from decades past and the wild vocal sounds you’ve only heard in your head are finally within reach. Manipulate your voice to create electronic vocal textures, robot sounds, computerized harmonies, vocoder and talkbox effects, thick octaves or doubles, and everything in between. Unique vocal effects have driven hit songs and launched careers. It’s time for your vocals to stand out, too.Drive hit songs and stand out your vocals victimization numerous distinctive vocal effects.
iZotope VocalSynth 2 Serial Key Free Download Full Version With Crack
iZotope VocalSynth 2 Serial Key Full Version Crack offers all the tools you wish to form music production at its highest level. Use four main vocal engines including: Vocoder, Polyvox, Compuvox and conjointly Talkbox. iZotope VocalSynth Full Version helps you to build your backing choir from simply a lead vocal. produce extra voices conjointly fill out a composition and add depth and impact to your chorus or bridge.Download iZotope VocalSynth V1.00 Full + Crack Version with a single click below. Install this vocal master software for windows & Mac OS X. Also, enjoy creating vocal sounds with higher quality. It offers all the tools you need to make music production at its highest level. Use four main vocal engines including: Vocoder, Polyvox, Compuvox and also Talkbox. iZotope VocalSynth Full Version lets you build your backing choir from just a lead vocal. Create additional voices also fill out a composition and add depth and impact to your chorus or bridge.
Technical Setup Details
- Software Full Name: iZotope VocalSynth v1.00
- Setup File Name: iZotope VocalSynth v1.00.zip
- Setup Type: Offline Installer / Full Standalone Setup
- Compatibility Architecture: 32 Bit (x86) / 64 Bit (x64) / macOS
- Developers: Homepage
Izotope 4 Crack Keygen 1
Fresh Key Features
- Four vocal engines: Get robotic vocals (Vocoder), organic harmonies (Polyvox), glitchy digital speech (Compuvox), and singing synthesized sounds (Talkbox).
- Specialized vocal effects: Add edgy or tasteful distortion, filters, speaker convolution modeling, beat-repeating madness, and wide stereo delays.
- Pitch correction: Correct off-key notes in your vocals with real-time pitch correction with natural-sounding results.
- Streamlined voice generation: Add harmonies, octaves, or unisons in Auto mode, or get the exact harmony voicings you want.
- Presets: Quickly access classic sounds you’ve known and loved, plus distinctive new combinations of all four vocal engines.
- Vocoder
- Quickly choose from a spread of classic hardware conjointly trendy digital vocoder sounds.
- ancient vocoders and talkboxes are tough items of hardware to master.
- Provides easy accessibility to the classic sounds with no drool.
- Add an entire heap of pitch-shifted superhero sounds to your voice.
- Includes four vocal engines: organic harmonies, get robotic vocals, glitchy digital speech conjointly singing synthesized sounds.
- simple to access classic sounds you’ve glorious and wanted.
- Add harmonies, octaves, or unisons in machine mode, or get the precise harmony voicings.
Advantages
Izotope 4 Crack Keygen Download
- Allows strong interventions in windows installations.
- Great functionality.
Disadvantage
- Not absolutely all functions designed for free.
- Very long-lasting procedure.
System Requirements
- Windows XP/Vista/7/8/10. (Both 32-bit & 64-bit supported)
- Intel 1.0 GHz processor.
- 512 MB RAM
- 50 MB Free Disc Space.
Izotope Free Download With Crack
How To Install ?
- 1: Click on Download Button.
- 2: Softwares Auto Download.
- 3: Open Download File.
- 4: Click on Install.
- 5: Follow The Instructions.
- 6: Thanks For Downloading.
Izotope Ozone 8 Crack
Editor Conclusion About iZotope VocalSynth 2 Crack
iZotope VocalSynth 2 Crack is designed to open up an expansive array of vocal potential, allowing the user to produce complex, interesting and unique vocal effects.Shape and manipulate your voice to create electronic vocal textures, robot sounds, computerised harmonies, vocoder and talkbox effects, and thick octaves or doubles. Uncover otherworldly sonic palettes or finally access the vocal treatments of your favourite tracks.Drive hit songs and stand out your vocals using various unique vocal effects. iZotope VocalSynth keygen is mainly designed to vocalists, singers, music creators, DJs, as well as many other professionals. You can also improve epic sound tracks. Experience the new usage of this new version. Uncover a wild vocal treatment you have never expected. Surf throughout your libraries also access all the sounds. Use various presets to unlock iconic vocal sounds such as: hardware vocoders, classic talkbox, vintage computer voice chips, or formant and pitch-shifting effects. iZotope VocalSynth Full Version lets you build your backing choir from just a lead vocal. Create additional voices also fill out a composition and add depth and impact to your chorus or bridge.
Izotope Keygen Challenge Code
iZotope
iZotope, Inc. is an audio technology company based in Cambridge, Massachusetts, United States. iZotope develops professional audio software for audio recording, mixing, broadcast, sound design, and mastering which can be used in wide range of Digital Audio Workstation (DAW) programs. In addition, iZotope creates and licenses audio DSP technology including noise reduction, sample rate conversion, dithering, time stretching, and audio enhancement to hardware and software companies in the consumer and pro audio industries.
Software[edit]
| Product name | Release date | Description |
|---|---|---|
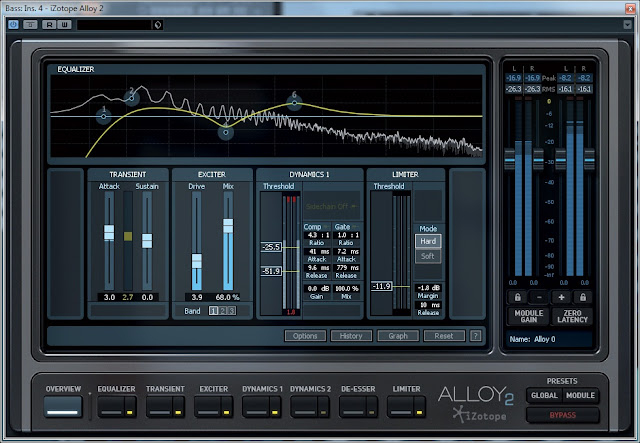
| Alloy 2 | August 14, 2012[1] | channel strip plugin with EQ, Transient Shaper, Dynamics, Exciter, Limiter, and De-Esser |
| ANR-B | May 10, 2007[2] | iZotope's only hardware unit — adaptive realtime noise reduction for broadcast audio |
| BreakTweaker | January 23, 2014[3] | drum sculpting and beat sequencing machine that blurs the line between rhythm and melody |
| DDLY Dynamic Delay | February 9, 2016[4] | responds to track musical dynamics to create unique delays |
| Insight | November 13, 2012[5] | CALM Act compliant essential metering suite |
| Iris 2 | November 19, 2014[6] | spectral sampling re-synthesizer featuring spectral selection tools |
| Nectar | November, 2010[7] | vocal production suite |
| Nectar 2 | October 18, 2013[8] | |
| Nectar 3 | October 16, 2018 | |
| Neutron | October 5, 2016[9] | audio mixing plug-in suite including advanced analysis and metering |
| Neutron 2 | October 5, 2017[10] | |
| Neutron 3 | June 6, 2019[11] | |
| Ozone 7 | November 3, 2015[12] | mastering suite with equalizer and dynamic eq, dynamics processing, exciter, spectral shaping processor, imager, maximizer, track referencing system and mastering assistant |
| Ozone 8 | October 5, 2017[10] | |
| Ozone 9 | October 3, 2019[13] | |
| RX 6 | April 20, 2017[14] | audio restoration suite |
| RX 7 | September 13, 2018 | |
| Stutter Edit | January 13, 2011[15] | sample stutter effects and slicing |
| Tonal Balance Control | October 5, 2017[10] | visual analysis tool measuring the distribution of energy across frequency spectrum, comparing audio to program-specific or custom-created targets |
| Trash 2 | November 19, 2012 | 64-bit modeling of guitar amplifiers, distortions, delays and filters |
| Vinyl | February 1, 2001[16] | record simulation and lo-fi effect |
| Vocalsynth 2 | 2018 | Color and shape vocals to the point of unrecognizable, using vocoder, talkbox, and other features. Includes a full suite of stompbox-style studio effects. |
Mobile applications[edit]
- Spire — iOS recording app
- iDrum and iDrum Mobile (acquired on December 4, 2006)[17] — virtual drum machine[18]
- Music and Speech Cleaner — audio cleanup and enhancement suite[19]
- Sonifi — mobile remix mobile application developed by Sonik Architects[20]
- The T-Pain Effect (released July 20, 2011)[21] — beat and vocal recording software with pitch correction
Third-party plugins[edit]
Discontinued products[edit]
Compatible software[edit]
iZotope's software can be used with Pro Tools, Apple's Logic Pro and GarageBand, Cakewalk SONAR, Nuendo, Digital Performer, WaveLab, Adobe Audition, Magix VEGAS, Reaper, FL Studio, Ableton Live etc.
Hardware[edit]
Izotope recently launched an iPhone-driven physical recording device competing with Zoom and Tascam, branded Spire Studio. It works wirelessly with the Spire IOS app and includes 4Gb of storage and XLR/TS ports for instrument jacks and mics in addition to the on board, internal mic. It is small, portable and not rack mounted and appears to be targeted to smaller bands and single musicians as well as home studios, as well as the podcasting and meeting sectors.
Licensing[edit]
iZotope has recently branched out its business to include software and technology licensing after ten years of developing audio processing algorithms and tools for their own software. iZotope offers development of technology for Mac and Windows platforms, Mobile, Video Game, and Embedded DSP. Clients have included Sony, Adobe, Xbox, Harmonix,[28]Smule, Sonoma Wire Works, and most recently, Blue Microphones.[29] Algorithms are delivered as a plugin or SDK for easy implementation. To date, iZotope technology has shipped in nearly 68 million products worldwide.[30]
Licensed technologies[edit]
- Mac/PC[31]
iZotope has audio technology readily available in the form of VST, DirectX, AudioUnits, RTAS or AudioSuite plug-ins. Typical uses for licensed technology for Mac or PC applications include audio finalizing, music production, audio for video, presentation audio, metering to address broadcast loudness standards, and media playback. Categories of available licensed technologies include audio enhancement, voice enhancement, audio repair tools, creative tools, DJ tools, audiophile tools, time manipulation and audio for video.
- Video Games[32]
iZotope has developed plugins for use directly in Audiokinetic WWise for audio enhancement, voice effects occlusion and room modeling. In addition, iZotope has developed sound design tools and special effects for sound designers using the FMOD middleware engine. For middleware engines supporting XAudio and Multistream formats, iZotope has a collection of licensable DSP for use in music related games or karaoke.
- Mobile SDKs[33]
- Core FX
- Audio Repair
- DJ FX
- Vocal FX
- Trash FX
- Fun FX
- Embedded[34]
Noise reduction DSP is available for use in hardware using Analog Devices SHARC and Blackfin processors. In 2012, iZotope embedded Adaptive Noise Reduction and Keyboard Click Reduction technologies on Blue Microphones' Tiki USB Mic.[35]
- Other
- Omega — realtime time and pitch control
- Radius — natural time stretching technology. Integrated into Digidesign's Pro Tools Elastic Time as well as Cakewalk SONAR. Available as a plug-in for Apple Logic Pro.
- SRC — 64-bit sample rate conversion.
Notable licensing partners[edit]
| Mac and PC | Video games | Mobile |
|---|---|---|
|
|
|
Artist references[edit]
Awards and accolades[edit]
References[edit]
- ^"Izotope Alloy 2". Sound on Sound. Retrieved October 4, 2019.
- ^"Izotope ANR-B". Sound on Sound. Retrieved October 4, 2019.
- ^"iZotope Break Tweaker". Sound on Sound. Retrieved October 4, 2019.
- ^"iZotope release free DDLY Dynamic Delay". Sound on Sound. Retrieved October 4, 2019.
- ^"Izotope Insight". Sound on Sound. Retrieved October 4, 2019.
- ^"iZotope Iris 2". Sound on Sound. Retrieved October 4, 2019.
- ^"Izotope Nectar". Sound on Sound. Retrieved October 4, 2019.
- ^"iZotope Nectar 2". Sound on Sound. Retrieved October 4, 2019.
- ^"iZotope Neutron". Sound on Sound. Retrieved October 4, 2019.
- ^ abc"iZotope Neutron 2 & Ozone 8". Sound on Sound. Retrieved October 4, 2019.
- ^"iZotope announces Neutron 3". Visuals Producer. June 6, 2019. Retrieved November 21, 2019.
- ^"iZotope Ozone 7". Sound on Sound. Retrieved October 4, 2019.
- ^"iZotope Ozone 9 Released - New AI Based Features - Exclusive Demo And Review". Production Expert. Retrieved October 4, 2019.
- ^"iZotope RX6". Sound on Sound. Retrieved October 4, 2019.
- ^"Izotope Stutter Edit". Sound on Sound. Retrieved October 4, 2019.
- ^"iZotope Releases Free Vinyl Plug-In". iZotope, Inc. Archived from the original on February 24, 2013. Retrieved July 11, 2012.
- ^McConnon, Brian. "IZOTOPE ACQUIRES IDRUM AND PHATMATIK PRO". iZotope, Inc. Archived from the original on February 24, 2013. Retrieved July 11, 2012.
- ^"iDrum". iZotope, Inc.
- ^"Music and Speech Cleaner".
- ^"Sonifi iPhone App lets your fingers remix music". Los Angeles Times. November 17, 2009.
- ^McConnon, Brian. "T-Pain and iZotope Introduce The T-Pain Effect". Music Marcom. Archived from the original on June 1, 2012. Retrieved July 11, 2012.
- ^McConnon, Brian. "iZotope Releases Ozone Maximizer Rack Extension for Reason". Music Marcom. Archived from the original on February 24, 2013. Retrieved July 11, 2012.
- ^McConnon, Brian. "iZotope Introduces Mastering Essentials". Music Marcom. Archived from the original on May 7, 2012. Retrieved July 11, 2012.
- ^McConnon, Brian. "iZotope Releases iZotope Radius for Logic". Music Marcom. Archived from the original on February 24, 2013. Retrieved July 11, 2012.
- ^McConnon, Brian. "iZotope Acquires iDrum and pHATmatik PRO". Music Marcom. Archived from the original on February 24, 2013. Retrieved July 11, 2012.
- ^"Introducing iZotope Spectron". iZotope, Inc. Archived from the original on February 24, 2013. Retrieved July 11, 2012.
- ^"Spectron". iZotope, Inc.
- ^McConnon, Brian. "iZotope Technology Licensed for Inclusion in Rock Band 3". iZotope, Inc. Retrieved July 11, 2012.
- ^"tiki FAQ". Blue Microphones.
- ^"Powered By iZotope". iZotope, Inc. Retrieved June 6, 2012.
- ^"Mac/Win". iZotope. Retrieved June 6, 2012.
- ^"About iZotope | Audio Software, Plug-ins, VST". Izotope.com. Retrieved December 16, 2017.
- ^"Audio for iOS". iZotope. Retrieved June 6, 2012.
- ^"Embedded Audio Repair Tools". iZotope. Retrieved June 6, 2012.
- ^"AES12: iZotope Technology Embedded Into Microphones". Sonicstate.com. October 30, 2012. Retrieved December 16, 2017.
- ^"ahkatz5 on Twitter". Archived from the original on May 11, 2020.
- ^"Year Zero". NinWiki. Retrieved December 16, 2017.
- ^"Red Bull Music Academy". Red Bull Music Academy. Retrieved December 16, 2017.
- ^"Archived copy". Archived from the original on May 31, 2012. Retrieved June 6, 2012.CS1 maint: archived copy as title (link)
- ^"Archived copy". Archived from the original on June 10, 2012. Retrieved June 6, 2012.CS1 maint: archived copy as title (link)
- ^"Winners Announced for the 65th Primetime Emmy Engineering Awards". Retrieved February 24, 2014.
Further reading[edit]
- Frakes, Dan (October 7, 2008). "Editors' Notes – An array of audio offerings at AES – iZotope iDrum Hip-Hop Edition and iDrum Club Edition". MacWorld. Retrieved October 28, 2008.
- Rogerson, Ben (October 6, 2008). "iZotope Ozone 4 promises better mastering A pro sound from within your DAW?". MusicRadar.com. Retrieved October 28, 2008.
- Alexander, Jason Scott (June 1, 2008). "Field Test: iZotope RX Advanced Restoration SoftwareEASY-TO-USE MODULES OFFER TRANSPARENT, MUSICAL RESULTS". Mix. Archived from the original on January 7, 2009. Retrieved October 28, 2008.
- "IZotope Ozone 4 en janvier..."PC Music (in French). October 7, 2008. Retrieved October 28, 2008.
- "iZotope Ozone 4 en enero de 2009". Hispasonic (in Spanish). Retrieved October 28, 2008.
- "RX Review in Mix Magazine - June Issue". MixMagazine. Archived from the original on January 7, 2009. Retrieved October 28, 2008.
- "ANR-B Review in Sound on Sound Magazine - April". SoundOnSoundMagazine. Archived from the original on September 30, 2015. Retrieved October 28, 2008.
- "RX featured in Electronic Musician "Noises Off" - August". ElectronicMusician. Archived from the original on October 20, 2008. Retrieved October 28, 2008.
- "Ozone 3 review in Mix Magazine- Mar.2004". MixMagazine. Retrieved October 28, 2008.
External links[edit]
VocalSynth 2 Help Documentation

VocalSynth 2 includes a number of new features and workflow enhancements. The following guide highlights the key areas of the interface:
| KEY | DESCRIPTION |
|---|---|
| PLUG-IN INSTANCE NAME: Displays the name of the current instance of VocalSynth 2. This name can be edited by clicking on the pencil icon. VocalSynth 2 instance names appear in selection menus of compatible iZotope plug-ins. VocalSynth 2 can be selected in Tonal Balance Control and Neutron 2 Masking Meters and controlled by the Neutron 2 Visual Mixer. | |
| GLOBAL INPUT MODE: This button displays the icon and name of the currently selected global input mode. To change the global input mode, click on this button to enter the global mode selection screen. | |
| PRESETS: Opens the Preset Manager window and displays the currently selected preset name. | |
| PREVIOUS/NEXT PRESET BUTTONS: Selects the previous or next preset in the preset list. These buttons are useful for auditioning different presets quickly without having to open the preset manager window. | |
| OPTIONS& HELP: Clicking on the gear button will open the VocalSynth options window. Clicking on the ‘?’ button will launch this help documentation. | |
| BIOVOX: This panel includes the main Biovox module controls, Biovox synth preset selector and access to the Biovox Advanced View by clicking on the mixer icon to the right of the synth preset previous/next buttons. | |
| VOCODER: This panel includes the main Vocoder module controls, Vocoder synth preset selector and access to the Vocoder Advanced View by clicking on the mixer icon to the right of the synth preset previous/next buttons. | |
| COMPUVOX: This panel includes the main Compuvox module controls, Compuvox synth preset selector and access to the Compuvox Advanced View by clicking on the mixer icon to the right of the synth preset previous/next buttons. | |
| TALKBOX: This panel includes the main Talkbox module controls, Talkbox synth preset selector and access to the Talkbox Advanced View by clicking on the mixer icon to the right of the synth preset previous/next buttons. | |
| POLYVOX: This panel includes the main Polyvox module controls and allows you to access the Polyvox Advanced View by clicking on the mixer icon at the bottom of the panel. | |
| PITCH: Includes Register settings for pitch detection and correction, Pitch Correction controls and a dry/pitch corrected signal level control. | |
| VOICING: Reveals the Voicing controls tab. The Voicing tab includes controls for the internal synthesizers when using VocalSynth 2 in Auto or MIDI Mode. | |
| METER & X/Y PAD VIEW SELECTOR: Toggles between the meter and X/Y pad controller views. The default meter selection can be changed in the Options window. | |
| OUTPUT: Includes global output Mix, a Gate Threshold control, Pan, Width and output Gain controls. | |
| ADJUSTABLE EFFECTS CHAIN: Click and drag on the dots above the mix slider in any effect panel to change the position of the effect in the processing chain. The following effects are available in the effects Chain: | |
| DISTORT effect. | |
| FILTER effect. | |
| TRANSFORM effect. | |
| SHRED effect. | |
| CHORUS effect. | |
| DELAY effect. | |
| RING MOD effect. |
Overview
VocalSynth is designed to be inserted on a vocal track and offers different input modes to determine how it applies processing to your vocal.
VocalSynth relies on two input signals to process a vocal, a modulator and a carrier input.
- Modulator: The modulator (voice/speech) is the audio from the track VocalSynth is inserted on. The modulator imparts spectral characteristics on the carrier signal.
- Carrier: The carrier signal takes on spectral characteristics of the modulator and is further modified by the processing parameters in the different modules. The carrier directly influences the processed (wet) output signal of VocalSynth. The source of the carrier signal is different depending on the global mode you have selected, see the mode descriptions below for more information.
Changing Modes
You can change the currently selected mode by clicking on the mode button in the top bar of the interface:
In the mode selection screen, select a mode and click “Accept” to change to the selected mode. You can exit the mode selection screen without changing modes by clicking the “Cancel” button.
The following sections outline how the different Global Modes in VocalSynth 2 work:
Auto Mode
When Auto mode is selected, the incoming audio serves as the source for the modulator and the carrier.
VocalSynth listens to the incoming audio and detects pitch information based on the range selected in the Pitch controls area. The pitch information it detects informs the notes played by the internal synth engine. The notes played by the synth can be further customized by adjusting the auto voice parameters in the Voicing panel.
No special configuration is needed to process your vocal in Auto Mode. As long as the vocal track VocalSynth is inserted on contains audio, you will hear the effect.
Auto Mode is ideal for adding textural effects to your vocal. Not a keyboard player? Not using MIDI in your session? Auto mode may be the best option for manipulating your vocal.
MIDI Mode
MIDI Mode allows you to play harmonies into VocalSynth to create interesting vocal effects tailored to the musical structure of your song.
When MIDI mode is selected, the modulator signal is the incoming audio from the track VocalSynth is inserted on.
The carrier input is based on MIDI information from a connected MIDI keyboard or MIDI clip in your session. The MIDI notes received by VocalSynth tell the internal synth engine what notes to play.
You can choose between Mono or Poly mode and adjust Glide time amount (Mono mode only) in the Voicing panel.
Need help configuring MIDI mode?
Configuring MIDI mode can vary depending on your DAW. For detailed setup instructions, check out the DAW Setup chapter.
Sidechain Mode
Routing non-traditional sources (a guitar or synthesizer, for example) to the sidechain input of VocalSynth when operating in Sidechain mode can create some interesting experimental sounds.
Sidechain mode bypasses the internal synthesizers and routes the audio signal from the selected sidechain input into VocalSynth. The audio routed into VocalSynth’s sidechain input will be modulated by your vocal track, allowing you to make any audio source “talk”.
When Sidechain mode is selected, the modulator signal is the incoming audio from the track VocalSynth is inserted on. The audio input from a configured sidechain source is treated as the carrier.
Sidechain Mode Limitations
Not all VocalSynth features are available in Sidechain mode. The following controls are disabled in Sidechain Mode:
- All controls in the Module Advanced View “Synth” sections are disabled because the internal synth engine is disabled in this mode.
- All controls in the Voicing section are disabled because the internal synth engine is disabled in this mode.
- The Polyvox module is disabled in Sidechain mode.
Need help setting up Sidechain mode?
Configuring Sidechain mode can vary depending on the DAW you are using. For detailed setup instructions, check out the DAW Setup chapter.
Overview
VocalSynth offers an X/Y pad controller and output effects/mixer section for enhanced control of the processing applied to your vocal. In addition to these controls, an output meter and two visualization options allow you to monitor processing activity in different ways.
XY View
The X/Y pad controller can be accessed by selecting the X/Y button in the center of the interface.
You can assign parameters to the x-axis by selecting them from the “X” dropdown menu. Moving the X/Y pad node horizontally will increase or decrease the selected parameter’s value. The left edge of the X/Y pad represents the minimum value of the control, the right edge represents the maximum value.
You can assign parameters to the y-axis by selecting them from the “Y” dropdown menu. Moving the X/Y pad node vertically will increase or decrease the selected parameter’s value. The bottom edge of the X/Y pad represents the minimum value of the parameter, the top edge represents the maximum value.
The following parameters can be assigned to either axis of the X/Y pad controller:
| X/Y Params | ||||
|---|---|---|---|---|
| Biovox Breath | Compuvox Bats | Distort Drive | Polyvox Character | Talkbox Drive |
| Biovox Clarity | Compuvox Bits | Distort Mix | Polyvox Formant | Talkbox Formant |
| Biovox Lvl | Compuvox Bytes | Distort Tone | Polyvox Humanize | Talkbox Lvl |
| Biovox Nasal | Compuvox Lvl | Filter Freq | Polyvox Lvl | Talkbox Speaker |
| Biovox Shift | Delay Feedback | Filter Mix | Ring Mod Depth | Transform Mix |
| Chorus Depth | Delay Mix | Filter Res | Ring Mod Freq/Time | Transform Width |
| Chorus Mix | Delay Time | Lvl (Dry/Corrected) | Ring Mod LFO | Vocoder Lvl |
| Chorus Rate | Delay Width | Output Mix | Ring Mod Mix | Vocoder Scale |
| Chorus Width | - | Shred Mix | - | Vocoder Shift |
Meter View
A vocal that sounds good deserves to look good too. VocalSynth 2 comes with a brand new way to visualize your vocal. If you prefer the Wave Meter from VocalSynth 1, you can select it from the Meter dropdown menu in the Options window.
ANEMONE
The anemone meter displays visual information for each module and allows you to control module level amounts by clicking and dragging on the associated node (B = Biovox, V = Vocoder, C = Compuvox, T = Talkbox, P = Polyvox). If a module is disabled, the associated node and visualization will be hidden. The shape of the visualization for each module changes based on MFCC (Mel Frequency Cepstral Coefficients) calculations.
WAVE METER
The wave meter displays frequency spectrum information based on the output of VocalSynth.
How do I get the Wave meter to show up?
- Open the Options window and select “Wave” in the “Meter” dropdown menu.
Output
MIX
Adjusts the balance between the processed (wet) and unprocessed (dry, pre-FX) signals.
GATE
Adjusts the Gate threshold level. The Gate detection occurs on the input signal level, gating is applied to the wet output signal before effects chain processing. In other words, if the input signal level falls below the Gate threshold level, gating will be applied to the wet (processed) signal before it is processed by the effects chain.
PAN
Adjusts the stereo pan position of the output signal.
WIDTH
Adjusts the amount of stereo widening or narrowing effect applied to the output of VocalSynth. At -100 this will narrow the apparent stereo width of the output so that it is effectively mono. At +100 this effect will exaggerate the stereo image width of the output signal.
LVL
Applies a clean gain offset amount to the output signal. Clip indicators appear when the output of the plug-in is clipping. You can clear the clip indicator lights by clicking on them after stopping playback.
Overview
The Pitch and Voicing control tabs allow you to adjust pitch detection and correction parameters, dry voice gain, and synth voice parameters.
Pitch
REGISTER
Controls how VocalSynth 2 detects and analyzes incoming vocal data. There are three Register settings to choose from: LOW, MID, HIGH.
Tip
- Start with the Mid setting for most audio applications.
- If you notice any undesirable behavior or artifacts in the detected pitches, experiment with the Low and High options to achieve the best results.
Auto Mode & Register
When VocalSynth 2 is in Auto mode, the Register control will effect how the pitch tracking interacts with the oscillators. If the Register is set to High and you’re singing Low, the oscillators in the Compuvox, Vocoder, or Talkbox modules won’t be able to follow your vocal effectively.
LVL
Adjusts the dry input/pitch corrected signal level.
ENABLE CORRECTION
Enables/disables pitch correction processing.
SCALE TYPE
There are two methods for selecting the scale type used for pitch correction: KEY and CUSTOM.
- KEY: Allows you to choose between several predefined scale types.
- Scale: Defines the scale used to snap your incoming vocal pitches to. Choose from Major, Minor or Chromatic.
Tip: Chromatic Scale
- If you don’t know what scale to use, set your scale type to Chromatic.
- Root: Defines the root note or key for pitch correction. It is important to set an accurate root note as this helps the pitch correction algorithm determine the best possible pitches for your vocals to correct to.
- Scale: Defines the scale used to snap your incoming vocal pitches to. Choose from Major, Minor or Chromatic.
- CUSTOM: Custom mode allows you to create a unique scale type. This can be useful for creative effects, such as locking a vocal to only a few pitches, or practical, such as creating a particular scale (e.g. pentatonic). When defining a Custom scale, click on any notes of the keyboard that you wish to enable/disable as options for pitch correction. When the individual notes are enabled, they’ll display a bright white.
SPEED
Determines how quickly your incoming vocals will be snapped to any particular note. Speed ranges from 0 to 100 ms. Values closer to 0 ms achieve robotic, immediate pitch snapping, where values higher than 50 ms obtain more natural and transparent results.
STRENGTH
Controls how closely the pitch correction will pull your voice to the correct frequency. Lower strength values may not perfectly correct a pitch, but will lessen any tuning issues. This tends to sound more natural, but if you’re after the more robotic sound, you’ll want Strength turned up.
Voicing
There are two global modes that allow you to control aspects of the internal synthesizer voices in VocalSynth 2: Auto mode and MIDI mode. When Sidechain mode is selected, the internal synthesizers are bypassed and all Voicing controls are disabled. Read more about the global different input modes in the Global Modes chapter.
AUTO MODE VOICING
INTERVAL
Defines an interval for each of the 3 auto voices. This interval is how far away, diatonically, the new harmony will be from the root note of the musical key. The musical key is defined in the Pitch control panel (which doesn’t have to be enabled).
LVL
Adjusts the level of the auto generated voices sent to the modules for processing.
MIDI MODE VOICING
MONO
Short for monophonic. Allows only one pitch to be played at a time, but playing notes consecutively will not retrigger the internal envelopes.
POLY
Short for polyphonic. Allows multiple pitches to be played at once (known as polyphony) like chords with lines or melodies that might have overlapping voices.
GLIDE
Adjusts the portamento speed when transistioning from one note to another (Mono Mode only).
Overview
Inspired by articulatory synthesis, Biovox offers tools for altering physiological qualities of a vocal. The module estimates a vocal tract shape from the incoming audio and allows you to effectively manipulate the vocal tract length and shape using just a few intuitive controls. In addition to adjusting properties of the vocal tract, you can control and blend vowel sounds using the vowel pad and even impose vocal imperfections such as nasality and breathiness on your vocal. Biovox is an innovative suite of tools for sculpting formants, tone, and the overall vocal aesthetic.
Controls
ENABLE
Enables/disables Biovox module processing.
CLARITY
Controls the amount of filter modulation applied to the signal. At lower values, more of the synth signal is present which allows Biovox to exhibit a playable synth character. Lower values also result in less intelligibility.
SHIFT
Alters vocal tract length to effectively shift the formants of the processed vocal higher or deeper. Positive values result in higher, chipmunk-like sounds. Negative values produce a deep, monster-like sound.
NASAL
Simulates changes to the soft palate to introduce a more nasal quality in the processed vocal.
BREATH
Mixes in a breathy, whisper-like character to the processed audio. At the minimum value, no breathiness is added to the signal. At the maximum value, Biovox will output only the breathy signal.
LVL
Controls the output level of the Biovox module.
Note
- You can also control the Biovox output level by dragging the node labeled ‘B’ that appears in the anemone visualization when the Biovox module is enabled.
SYNTH PRESET SELECTOR
Displays the currently selected synth preset name and allows you to change the synth preset without opening the advanced view. Clicking on the preset name display will open the synth preset list. Clicking on the left and right arrow buttons allows you to quickly load different synth presets. You can modify synth parameters and save new synth presets in the advanced view.
ADVANCED VIEW BUTTON
You can open the Advanced View window by clicking on the mixer button at the bottom of the module’s main panel:
Advanced View
The Biovox Advanced View includes:
- VOWEL: Control and blend vowel sounds.
- SYNTH: Customize synth parameters & save synth presets.
- MIX: Control filtering and panning of the module’s output signal.
Advanced View: Vowel
The Vowel chart is modeled after the official International Phonetic Alphabet Vowel Chart that maps vowels according to a physical location on the tongue. The Vowel chart controller can be used to impart the sound of a particular vowel on the processed signal by moving a node to different locations on the chart.
By default, the node is positioned in the center of the chart, resulting in no vowel blend.
Double-click to reset
Double-clicking on the node will return it to the default position in the center of the chart.
Dragging the node toward the outer boundaries of the chart will impart more of the nearest indicated vowel(s) to the processed audio.
When the node is positioned at an edge of the chart, the vowel blend is at the maximum amount and only the nearest vowel(s) will be audible in the processed output.
Advanced View: Synth
When Auto Mode or MIDI Mode is selected, you can control the oscillators and modulation settings for the notes being played into the Biovox module synth engine.
Sidechain mode disables synth controls
When Sidechain mode is selected, the sidechain input signal replaces the module synth engine as the carrier signal. Synth parameters are disabled in all modules when Sidechain is selected as the global mode.
SYNTH PRESETS
Modules that include synth parameters in the advanced view allow for synth presets to be saved and recalled.
- Default synth presets are loaded when VocalSynth is opened. Each module loads a different synth preset by default. Choosing the “Init” preset from the synth preset dropdown menu will return the module’s synth settings to the default preset values.
- Double-clicking on any knob in the “Synth” section of the advanced view will set the control to a factory default state, rather than resetting the value to the “Init” state.
LOAD PRESETS
Select a preset from the dropdown menu to load the saved synth parameter values in the current module.
Note
You can also quickly change synth presets without opening the advanced view by clicking on the left/right arrow buttons in the module main panel.
SAVE PRESETS
Click on the floppy disk button next to the preset dropdown menu to save a new Synth preset. Type a name in the text field and hit the enter/return key to save the preset.
OSC 1
| NAME | DESCRIPTION |
|---|---|
| ENABLE | Enables/disables Osc 1. |
| WAVEFORM | Selects the waveform shape. |
| GAIN | Adjusts the level of Osc 1. |
| PITCH: Coarse Tune | Tunes Osc 1 in coarse increments. (Semitones) |
| PITCH: Fine Tune | Tunes Osc 1 in fine increments. (Cents) |
| PITCH: MOD | Adjusts the amount of LFO modulation applied to Osc 1’s pitch. |
| SHAPE | Morphs the waveform shape. |
| SHAPE: MOD | Adjusts the amount of LFO modulation applied to the waveform shape. |
The following table outlines how each shape is affected by modulation:
| Shape | Modulation Behavior |
|---|---|
| SAW | Modifies the pulse width of the saw wave. |
| SQUARE | Modifies the pulse width of the square wave. |
| SYNC SAW | This shape simulates two synchronized saw oscillators. Modulating shape will modify the pitch ratio between the two saw oscillators. |
| TRIANGLE | Morphs the triangle wave into a saw wave shape. |
| SAWS | Simulates a swarm of seven saw waves. Modulating shape will modify the detune amount between the saw waves. |
OSC 2
| NAME | DESCRIPTION |
|---|---|
| ENABLE | Enables/disables Osc 2. |
| WAVEFORM | Selects the waveform shape. |
| GAIN | Adjusts the level of Osc 2. |
| PITCH: Coarse Tune | Tunes Osc 2 in coarse increments. (Semitones) |
| PITCH: Fine Tune | Tunes Osc 2 in fine increments. (Cents) |
| PITCH: MOD | Adjusts the amount of LFO modulation applied to Osc 2’s pitch. |
| SHAPE | Morphs the waveform shape. |
| SHAPE: MOD | Adjusts the amount of LFO modulation applied to the waveform shape. |
The following table outlines how each shape is affected by modulation:
| Shape | Modulation Behavior |
|---|---|
| SAW | Modifies the pulse width of the saw wave. |
| SQUARE | Modifies the pulse width of the square wave. |
| SYNC SAW | This shape simulates two synchronized saw oscillators. Modulating shape will modify the pitch ratio between the two saw oscillators. |
| TRIANGLE | Morphs the triangle wave into a saw wave shape. |
| SAWS | Simulates a swarm of seven saw waves. Modulating shape will modify the detune amount between the saw waves. |
NOISE
| NAME | DESCRIPTION |
|---|---|
| ENABLE | Enables/disables the Noise oscillator. |
| GAIN | Adjusts the level of Noise oscillator. |
| LFO/PITCH | Selects the modulation source used by the Crush Mod control. |
| CRUSH | Adjusts the amount of aliasing distortion applied to the noise oscillator. At the maximum value, the Noise oscillator will output white noise. |
| MOD | Adjusts the amount of modulation applied to the Crush parameter. The modulation source is determined by the LFO or Pitch selection to the left of the Crush knob. This Mod parameter allows for bidirectional modulation. |
LFO MOD SOURCE
These parameters define the waveshape and speed of the LFO modulation source. All Mod knobs in the current synth view (except for the Crush Mod control, which can toggle between LFO or Pitch modulation sources) use this LFO as their modulation source.
| NAME | DESCRIPTION |
|---|---|
| SHAPE | Selects the low frequency oscillator waveform shape. |
| RATE | Adjusts the speed of the low frequency oscillator. |
Advanced View: Mix
Adjusts stereo pan position and pass filter controls of the module’s output signal.
PAN
Controls the stereo pan position of the module’s output signal.
FILTER
Adjusts the center frequencies of high-pass and low-pass filters applied to the module’s output signal. Clicking and dragging on a node will adjust the center frequency of that filter. Clicking and dragging in the space below the two nodes will move both nodes at the same time.
Overview
As with a lot of today’s musical technologies, the vocoder (short for Voice Encoder) began life as a completely non-musical, utilitarian piece of electronic equipment. A vocoder relies on two signals, a carrier (synthesizer) and a modulator (usually a voice). Both of the incoming signals are split into a number of frequency bands. The amplitude of the modulator signal in each individual band is then used to control the amplitude of the corresponding bands of the carrier signal. This has the auditory effect of mapping the frequency characteristics of the modulator onto the carrier signal as amplitude changes in each of the frequency bands, resulting in what we hear as talking synthesizers.
VocalSynth 2 allows for detailed manipulation of the Vocoder frequency bands and carrier synth parameters in the Advanced View.
Controls
ENABLE
Turns Vocoder module processing on and off.
MODE
The Vocoder has three different modes which alter number of frequency bands used in both the modulator (voice) and carrier (instrument) input. You can adjust the gain and pan of the frequency bands by modifying the Bands controller in the Vocoder advanced view.
- SMOOTH: Reminiscent of the sound produced by early analog vocoders, but with the added benefit of wider resolution. This mode produces a pleasant, smooth sounding effect that retains intelligibility.
- VINTAGE: A classic analog vocoder sound with musically spaced frequency bands for a moderate level of resolution and a timeless sound.
- HARD: A modern analog hybrid rooted in classic vocoder designs. This mode offers greater resolution for a more articulate overall sound.
SHIFT
Alters the amount of frequency shift applied to each vocoder frequency band. Adjusting the Shift amount results in changes to the pitched timbre of the processed signal. Positive values result in brighter timbre but may reduce lower frequency presence in the processed signal. Negative values result in a darker sounding timbre, but may reduce higher frequency presence in the processed signal.
SCALE
Adjusts how quickly the vocoder responds to changing vowel sounds. Higher values may increase the articulation of the synthesized output, where lower values may sacrifice intelligibility for softer-sounding, pad-style result.
LVL
Controls the output level of the Vocoder module.
Note
- You can also control the Vocoder output level by dragging the node labeled ‘V’ that appears in the anemone visualization when the Vocoder module is enabled.
SYNTH PRESET SELECTOR
Displays the currently selected synth preset name and allows you to change the synth preset without opening the advanced view. Clicking on the preset name display will open the synth preset list. Clicking on the left and right arrow buttons allows you to quickly load different synth presets. You can modify synth parameters and save new synth presets in the advanced view.
ADVANCED VIEW BUTTON
You can open the Advanced View window by clicking on the mixer button at the bottom of the module’s main panel:
Advanced View
The Vocoder Advanced View includes:
- BANDS: Adjust the Volume and Pan of the Vocoder frequency bands.
- SYNTH: Customize synth parameters & save synth presets.
- MIX: Control filtering and panning of the module’s output signal.
Advanced View: Bands
Displays a bar for each Vocoder frequency band control. The currently selected view (Vol or Pan) determines what the bars control. The number of frequency bars displayed in the bands view is determined by the currently selected vocoder Mode.
VOL
When selected, adjusting a band control will modify the volume of the associated frequency band.
PAN
When selected, adjusting a band control will modify the stereo pan of the associated frequency band.
RESET
Sets controls in the currently selected band processing view to their factory default values.
Advanced View: Synth
When Auto Mode or MIDI Mode is selected, you can control the oscillators and modulation settings for the notes being played into the Vocoder module synth engine.
Sidechain mode disables synth controls
When Sidechain mode is selected, the sidechain input signal replaces the module synth engine as the carrier signal. Synth parameters are disabled in all modules when Sidechain is selected as the global mode.
SYNTH PRESETS
Modules that include synth parameters in the advanced view allow for synth presets to be saved and recalled.
- Default synth presets are loaded when VocalSynth is opened. Each module loads a different synth preset by default. Choosing the “Init” preset from the synth preset dropdown menu will return the module’s synth settings to the default preset values.
- Double-clicking on any knob in the “Synth” section of the advanced view will set the control to a factory default state, rather than resetting the value to the “Init” state.
LOAD PRESETS
Select a preset from the dropdown menu to load the saved synth parameter values in the current module.
Note
You can also quickly change synth presets without opening the advanced view by clicking on the left/right arrow buttons in the module main panel.
SAVE PRESETS
Click on the floppy disk button next to the preset dropdown menu to save a new Synth preset. Type a name in the text field and hit the enter/return key to save the preset.
OSC 1
| NAME | DESCRIPTION |
|---|---|
| ENABLE | Enables/disables Osc 1. |
| WAVEFORM | Selects the waveform shape. |
| GAIN | Adjusts the level of Osc 1. |
| PITCH: Coarse Tune | Tunes Osc 1 in coarse increments. (Semitones) |
| PITCH: Fine Tune | Tunes Osc 1 in fine increments. (Cents) |
| PITCH: MOD | Adjusts the amount of LFO modulation applied to Osc 1’s pitch. |
| SHAPE | Morphs the waveform shape. |
| SHAPE: MOD | Adjusts the amount of LFO modulation applied to the waveform shape. |
The following table outlines how each shape is affected by modulation:
| Shape | Modulation Behavior |
|---|---|
| SAW | Modifies the pulse width of the saw wave. |
| SQUARE | Modifies the pulse width of the square wave. |
| SYNC SAW | This shape simulates two synchronized saw oscillators. Modulating shape will modify the pitch ratio between the two saw oscillators. |
| TRIANGLE | Morphs the triangle wave into a saw wave shape. |
| SAWS | Simulates a swarm of seven saw waves. Modulating shape will modify the detune amount between the saw waves. |
OSC 2
| NAME | DESCRIPTION |
|---|---|
| ENABLE | Enables/disables Osc 2. |
| WAVEFORM | Selects the waveform shape. |
| GAIN | Adjusts the level of Osc 2. |
| PITCH: Coarse Tune | Tunes Osc 2 in coarse increments. (Semitones) |
| PITCH: Fine Tune | Tunes Osc 2 in fine increments. (Cents) |
| PITCH: MOD | Adjusts the amount of LFO modulation applied to Osc 2’s pitch. |
| SHAPE | Morphs the waveform shape. |
| SHAPE: MOD | Adjusts the amount of LFO modulation applied to the waveform shape. |
The following table outlines how each shape is affected by modulation:
| Shape | Modulation Behavior |
|---|---|
| SAW | Modifies the pulse width of the saw wave. |
| SQUARE | Modifies the pulse width of the square wave. |
| SYNC SAW | This shape simulates two synchronized saw oscillators. Modulating shape will modify the pitch ratio between the two saw oscillators. |
| TRIANGLE | Morphs the triangle wave into a saw wave shape. |
| SAWS | Simulates a swarm of seven saw waves. Modulating shape will modify the detune amount between the saw waves. |
NOISE
| NAME | DESCRIPTION |
|---|---|
| ENABLE | Enables/disables the Noise oscillator. |
| GAIN | Adjusts the level of Noise oscillator. |
| LFO/PITCH | Selects the modulation source used by the Crush Mod control. |
| CRUSH | Adjusts the amount of aliasing distortion applied to the noise oscillator. At the maximum value, the Noise oscillator will output white noise. |
| MOD | Adjusts the amount of modulation applied to the Crush parameter. The modulation source is determined by the LFO or Pitch selection to the left of the Crush knob. This Mod parameter allows for bidirectional modulation. |
LFO MOD SOURCE
These parameters define the waveshape and speed of the LFO modulation source. All Mod knobs in the current synth view (except for the Crush Mod control, which can toggle between LFO or Pitch modulation sources) use this LFO as their modulation source.
| NAME | DESCRIPTION |
|---|---|
| SHAPE | Selects the low frequency oscillator waveform shape. |
| RATE | Adjusts the speed of the low frequency oscillator. |
Advanced View: Mix
Adjusts stereo pan position and pass filter controls of the module’s output signal.
PAN
Controls the stereo pan position of the module’s output signal.
FILTER
Adjusts the center frequencies of high-pass and low-pass filters applied to the module’s output signal. Clicking and dragging on a node will adjust the center frequency of that filter. Clicking and dragging in the space below the two nodes will move both nodes at the same time.
More Information
One of the earliest vocoders was developed by Homer Dudley in the late 1920s/early 1930s at Bell Laboratories. Large-scale telephone networks were being implemented at the time, and the vocoder was developed as a potential solution to bandwidth issues. These early tools were designed to encode speech to reduce bandwidth, allowing multiple voice signals to be transmitted over the same cables. Vocoders even underpinned pivotal World War II technologies, such as the SIGSALY system used for secure voice transmission.
“The Carrier Nature of Speech. 1940. Bell System Technical Journal.”1Fast forward a few decades and the vocoder was starting to be used in some iconic musical applications. Early pioneers such as Werner Meyer-Eppler paved the way for Robert Moog and Wendy Carlos as well as Kraftwerk. In the early 1970s Moog and Carlos built a vocoder in which the carrier signal was a Moog modular synth and the modulator a mic input, which was heard several times on the soundtrack to Stanley Kubrick’s film adaptation of Anthony Burgess’ A Clockwork Orange. 2
Over the years vocoders have become so well known, audible on anything from ELO’s Mr. Blue Sky 3 and Michael Jackson’s P.Y.T. (Pretty Young Thing)4 to Coldplay’s Midnight 5 and now… whatever you’ll be using VocalSynth on next!
Overview
Compuvox is based on a technology known as Linear Predictive Coding (LPC) which has existed since the late 1960s. As with a number of the audio processors in VocalSynth, LPC was originally a communications technology for encoding intelligible speech at low bit rates to save bandwidth. Nowadays this computerized vocal sound is often used as a special effect common in electronic music production. The outcome sounds similar to infamous toys like the Furby, Speak n Spell (which uses LPC), and even older text-to-speech technologies.
HOW DOES COMPUVOX WORK?
Compuvox breaks down the vocal signal into two components. It simultaneously estimates the formants alongside the “excitation,” which is the buzz or noise created by the vocal folds. This information can then be used to recreate the sound of the vocal signal by synthesizing the excitation and filtering it through a formant filter. The simplifications that this model makes lead to some wonderfully cool artifacts.
Controls
ENABLE
Enables/disables Compuvox module processing.
BITS
Adds digital aliasing noise to the signal by resampling it using a low-quality technique known as zero-order hold interpolation. Used gently, this can add an interesting inharmonic quality to the sound. Pushed farther, this control can reduce your audio to almost unrecognizable levels of digital chaos.
BYTES
Allows you to artificially prolong vowel sounds. Stretching vowels out in this way can create some interesting non-human yet musically useful vocal effects.
BATS
Increases noise and vocal gravel for a winged-animal-man effect.
Tip
There are some genuinely fun, diverse, and practical ways to use this control. With a lead vocal, especially in some rap, EDM, or metal tracks, pushing Bats close to 100%, but then using the Mixer to only blend in a small amount of Compuvox helps fill out the bottom of the vocal with some really solid noise full of emotion and inflection.
MODE
Compuvox has three different modes that represent multiple different flavors of LPC processing. They react differently to varying types of incoming vocals so experiment with each mode to find the setting that works best for your audio.
- SPELL: The most balanced LPC setting, using medium strength and size filtering for an articulate and classic sound.
- READ: The strongest high-order filter mode; it also contains a smaller window size and a faster analysis to give you a narrower sound.
- MATH: The broadest setting; it contains a wider windowing size, a more gentle filter, and a reasonably fast analysis speed to give an alternate timbre and sound.
LVL
Controls the output level of the Compuvox module.
Note
- You can also control the Compuvox output level by dragging the node labeled ‘C’ that appears in the anemone visualization when the Compuvox module is enabled.
SYNTH PRESET SELECTOR
Displays the currently selected synth preset name and allows you to change the synth preset without opening the advanced view. Clicking on the preset name display will open the synth preset list. Clicking on the left and right arrow buttons allows you to quickly load different synth presets. You can modify synth parameters and save new synth presets in the advanced view.
ADVANCED VIEW BUTTON
You can open the Advanced View window by clicking on the mixer button at the bottom of the module’s main panel:
Advanced View
The Compuvox Advanced View includes:
- SYNTH: Customize synth parameters & save synth presets.
- MIX: Control filtering and panning of the module’s output signal.
Advanced View: Synth
When Auto Mode or MIDI Mode is selected, you can control the oscillators and modulation settings for the notes being played into the Compuvox module synth engine.
Sidechain mode disables synth controls
When Sidechain mode is selected, the sidechain input signal replaces the module synth engine as the carrier signal. Synth parameters are disabled in all modules when Sidechain is selected as the global mode.
SYNTH PRESETS
Modules that include synth parameters in the advanced view allow for synth presets to be saved and recalled.
- Default synth presets are loaded when VocalSynth is opened. Each module loads a different synth preset by default. Choosing the “Init” preset from the synth preset dropdown menu will return the module’s synth settings to the default preset values.
- Double-clicking on any knob in the “Synth” section of the advanced view will set the control to a factory default state, rather than resetting the value to the “Init” state.
LOAD PRESETS
Select a preset from the dropdown menu to load the saved synth parameter values in the current module.
Note
You can also quickly change synth presets without opening the advanced view by clicking on the left/right arrow buttons in the module main panel.
SAVE PRESETS
Click on the floppy disk button next to the preset dropdown menu to save a new Synth preset. Type a name in the text field and hit the enter/return key to save the preset.
OSC 1
| NAME | DESCRIPTION |
|---|---|
| ENABLE | Enables/disables Osc 1. |
| WAVEFORM | Selects the waveform shape. |
| GAIN | Adjusts the level of Osc 1. |
| PITCH: Coarse Tune | Tunes Osc 1 in coarse increments. (Semitones) |
| PITCH: Fine Tune | Tunes Osc 1 in fine increments. (Cents) |
| PITCH: MOD | Adjusts the amount of LFO modulation applied to Osc 1’s pitch. |
| SHAPE | Morphs the waveform shape. |
| SHAPE: MOD | Adjusts the amount of LFO modulation applied to the waveform shape. |
The following table outlines how each shape is affected by modulation:
| Shape | Modulation Behavior |
|---|---|
| SAW | Modifies the pulse width of the saw wave. |
| SQUARE | Modifies the pulse width of the square wave. |
| SYNC SAW | This shape simulates two synchronized saw oscillators. Modulating shape will modify the pitch ratio between the two saw oscillators. |
| TRIANGLE | Morphs the triangle wave into a saw wave shape. |
| SAWS | Simulates a swarm of seven saw waves. Modulating shape will modify the detune amount between the saw waves. |
OSC 2
| NAME | DESCRIPTION |
|---|---|
| ENABLE | Enables/disables Osc 2. |
| WAVEFORM | Selects the waveform shape. |
| GAIN | Adjusts the level of Osc 2. |
| PITCH: Coarse Tune | Tunes Osc 2 in coarse increments. (Semitones) |
| PITCH: Fine Tune | Tunes Osc 2 in fine increments. (Cents) |
| PITCH: MOD | Adjusts the amount of LFO modulation applied to Osc 2’s pitch. |
| SHAPE | Morphs the waveform shape. |
| SHAPE: MOD | Adjusts the amount of LFO modulation applied to the waveform shape. |
The following table outlines how each shape is affected by modulation:
| Shape | Modulation Behavior |
|---|---|
| SAW | Modifies the pulse width of the saw wave. |
| SQUARE | Modifies the pulse width of the square wave. |
| SYNC SAW | This shape simulates two synchronized saw oscillators. Modulating shape will modify the pitch ratio between the two saw oscillators. |
| TRIANGLE | Morphs the triangle wave into a saw wave shape. |
| SAWS | Simulates a swarm of seven saw waves. Modulating shape will modify the detune amount between the saw waves. |
NOISE
| NAME | DESCRIPTION |
|---|---|
| ENABLE | Enables/disables the Noise oscillator. |
| GAIN | Adjusts the level of Noise oscillator. |
| LFO/PITCH | Selects the modulation source used by the Crush Mod control. |
| CRUSH | Adjusts the amount of aliasing distortion applied to the noise oscillator. At the maximum value, the Noise oscillator will output white noise. |
| MOD | Adjusts the amount of modulation applied to the Crush parameter. The modulation source is determined by the LFO or Pitch selection to the left of the Crush knob. This Mod parameter allows for bidirectional modulation. |
LFO MOD SOURCE
These parameters define the waveshape and speed of the LFO modulation source. All Mod knobs in the current synth view (except for the Crush Mod control, which can toggle between LFO or Pitch modulation sources) use this LFO as their modulation source.
| NAME | DESCRIPTION |
|---|---|
| SHAPE | Selects the low frequency oscillator waveform shape. |
| RATE | Adjusts the speed of the low frequency oscillator. |
Advanced View: Mix
Adjusts stereo pan position and pass filter controls of the module’s output signal.
PAN
Controls the stereo pan position of the module’s output signal.
FILTER
Adjusts the center frequencies of high-pass and low-pass filters applied to the module’s output signal. Clicking and dragging on a node will adjust the center frequency of that filter. Clicking and dragging in the space below the two nodes will move both nodes at the same time.
Overview
The Talkbox module emulates the effect of a hardware talkbox effect popularized by rock artists such as Peter Frampton, The Who, and Stevie Wonder, to name just a few. A talkbox imparts vocal characteristics on an input source (a guitar, for example) by driving the output of an instrument through a tube that terminates in or around a performer’s mouth. The signal is then filtered and modulated by the mouth, tongue and lip movements of the performer. The resulting effect sounds as though the guitar is “speaking” or “talking”. With it’s tube-free design and unique formant shifting feature, the Talkbox module is an excellent alternative to the traditional Talkbox pedal.
Controls
ENABLE
Enables/disables Talkbox module processing.
DRIVE
Increases the input gain into the Talkbox. Higher values will add a crunchy distortion to your signal. The additional harmonics generated when increasing the Drive amount can help to enhance intelligibility by effectively adding frequency content for your voice to modulate.
SPEAKER
Adjusts the amount of talkbox convolution applied to the signal. This simulates the internal acoustics of the speaker compression driver that is typically sealed inside of a hardware Talkbox pedal.
FORMANT
Adjusts the amount of formant shift applied to the incoming signal. VocalSynth’s talkbox algorithm has the ability to extract formant information from the incoming vocal, making this unique feature possible.
The deep, raspy, throatiness of a talkbox can sound very different from person to person, so if your vocal formants aren’t doing it for you, experiment by shifting them with this parameter.
MODE
Alters the response to high frequencies in both the modulator (voice) and carrier (instrument) input. You can choose from the following Talkbox modes:
- DARK: Offers a more brooding, bassy sound.
- CLASSIC: Most reminiscent of a classic talkbox, this is the default mode selection.
- BRIGHT: Offers an accentuated high-end that helps maximize bite and articulation.
LVL
Controls the output level of the Talkbox module.
SYNTH PRESET SELECTOR
Displays the currently selected synth preset name and allows you to change the synth preset without opening the advanced view. Clicking on the preset name display will open the synth preset list. Clicking on the left and right arrow buttons allows you to quickly load different synth presets. You can modify synth parameters and save new synth presets in the advanced view.
ADVANCED VIEW BUTTON
You can open the Advanced View window by clicking on the mixer button at the bottom of the module’s main panel:
Advanced View
The Talkbox Advanced View includes:
- SYNTH: Customize synth parameters & save synth presets.
- MIX: Control filtering and panning of the module’s output signal.
Advanced View: Synth
When Auto Mode or MIDI Mode is selected, you can control the oscillators and modulation settings for the notes being played into the Talkbox module synth engine.
Sidechain mode disables synth controls
When Sidechain mode is selected, the sidechain input signal replaces the module synth engine as the carrier signal. Synth parameters are disabled in all modules when Sidechain is selected as the global mode.
SYNTH PRESETS
Modules that include synth parameters in the advanced view allow for synth presets to be saved and recalled.
- Default synth presets are loaded when VocalSynth is opened. Each module loads a different synth preset by default. Choosing the “Init” preset from the synth preset dropdown menu will return the module’s synth settings to the default preset values.
- Double-clicking on any knob in the “Synth” section of the advanced view will set the control to a factory default state, rather than resetting the value to the “Init” state.
LOAD PRESETS
Select a preset from the dropdown menu to load the saved synth parameter values in the current module.
Note
You can also quickly change synth presets without opening the advanced view by clicking on the left/right arrow buttons in the module main panel.
SAVE PRESETS
Click on the floppy disk button next to the preset dropdown menu to save a new Synth preset. Type a name in the text field and hit the enter/return key to save the preset.
OSC 1
| NAME | DESCRIPTION |
|---|---|
| ENABLE | Enables/disables Osc 1. |
| WAVEFORM | Selects the waveform shape. |
| GAIN | Adjusts the level of Osc 1. |
| PITCH: Coarse Tune | Tunes Osc 1 in coarse increments. (Semitones) |
| PITCH: Fine Tune | Tunes Osc 1 in fine increments. (Cents) |
| PITCH: MOD | Adjusts the amount of LFO modulation applied to Osc 1’s pitch. |
| SHAPE | Morphs the waveform shape. |
| SHAPE: MOD | Adjusts the amount of LFO modulation applied to the waveform shape. |
The following table outlines how each shape is affected by modulation:
| Shape | Modulation Behavior |
|---|---|
| SAW | Modifies the pulse width of the saw wave. |
| SQUARE | Modifies the pulse width of the square wave. |
| SYNC SAW | This shape simulates two synchronized saw oscillators. Modulating shape will modify the pitch ratio between the two saw oscillators. |
| TRIANGLE | Morphs the triangle wave into a saw wave shape. |
| SAWS | Simulates a swarm of seven saw waves. Modulating shape will modify the detune amount between the saw waves. |
OSC 2
| NAME | DESCRIPTION |
|---|---|
| ENABLE | Enables/disables Osc 2. |
| WAVEFORM | Selects the waveform shape. |
| GAIN | Adjusts the level of Osc 2. |
| PITCH: Coarse Tune | Tunes Osc 2 in coarse increments. (Semitones) |
| PITCH: Fine Tune | Tunes Osc 2 in fine increments. (Cents) |
| PITCH: MOD | Adjusts the amount of LFO modulation applied to Osc 2’s pitch. |
| SHAPE | Morphs the waveform shape. |
| SHAPE: MOD | Adjusts the amount of LFO modulation applied to the waveform shape. |
The following table outlines how each shape is affected by modulation:
| Shape | Modulation Behavior |
|---|---|
| SAW | Modifies the pulse width of the saw wave. |
| SQUARE | Modifies the pulse width of the square wave. |
| SYNC SAW | This shape simulates two synchronized saw oscillators. Modulating shape will modify the pitch ratio between the two saw oscillators. |
| TRIANGLE | Morphs the triangle wave into a saw wave shape. |
| SAWS | Simulates a swarm of seven saw waves. Modulating shape will modify the detune amount between the saw waves. |
NOISE
| NAME | DESCRIPTION |
|---|---|
| ENABLE | Enables/disables the Noise oscillator. |
| GAIN | Adjusts the level of Noise oscillator. |
| LFO/PITCH | Selects the modulation source used by the Crush Mod control. |
| CRUSH | Adjusts the amount of aliasing distortion applied to the noise oscillator. At the maximum value, the Noise oscillator will output white noise. |
| MOD | Adjusts the amount of modulation applied to the Crush parameter. The modulation source is determined by the LFO or Pitch selection to the left of the Crush knob. This Mod parameter allows for bidirectional modulation. |
LFO MOD SOURCE
These parameters define the waveshape and speed of the LFO modulation source. All Mod knobs in the current synth view (except for the Crush Mod control, which can toggle between LFO or Pitch modulation sources) use this LFO as their modulation source.
| NAME | DESCRIPTION |
|---|---|
| SHAPE | Selects the low frequency oscillator waveform shape. |
| RATE | Adjusts the speed of the low frequency oscillator. |
Advanced View: Mix
Adjusts stereo pan position and pass filter controls of the module’s output signal.
PAN
Controls the stereo pan position of the module’s output signal.
FILTER
Adjusts the center frequencies of high-pass and low-pass filters applied to the module’s output signal. Clicking and dragging on a node will adjust the center frequency of that filter. Clicking and dragging in the space below the two nodes will move both nodes at the same time.
Overview
Polyvox is a voice generator that allows you to create vocal harmonies based on your vocal. Voice generators come in all shapes and sizes but are based on a similar fundamental concept: sampling an incoming audio signal and then creating multiple additional versions of this audio signal using time/pitch stretching to achieve different intervals, such as an octave down, a third up, and so on. Voice generators are most commonly used on voice but there are many examples of this type of technology being used in guitar effects as well, usually some combination of pitch/whammy adjustment.
Controls
ENABLE
Enables/disables Polyvox module processing.
FORMANT
Transposes the vocal formants of the signals it reproduces. This type of control is often talked about as the difference between deeper voiced and higher, chipmunk-style sounds.
CHARACTER
Controls the relationship between the incoming vocal’s formant envelopes and how they are applied to the outgoing sound.
A higher value will cause the formants themselves to shift more in the direction of the pitch of the audio (e.g. sing a higher pitch, formants scale upwards). Interestingly, this parameter can be used to increase naturality, if, say, the generated voices were consistently a lot higher or lower than the original source, or it can be used to push a voice into a sonic realm the human voice-box isn’t capable of. Pro tip: This is a lot safer than Helium.
By default, the voices generated by Polyvox will sound like your voice singing at potentially different pitches. The algorithm preserves the formants of an incoming vocal exactly as is…crucial for a natural sound.
HUMANIZE
Varies time and pitch offset amount applied to the generated voices. This reduces phase cancellation and can increase realism slightly.
A higher Humanize value will start to introduce more extreme variations to the point of detuning, a very powerful auditory sensation, especially when done in unison.
LVL
Controls the output level of the Polyvox module.
Note
You can also control the Polyvox output level by dragging the node labeled ‘P’ that appears in the anemone visualization when the Polyvox module is enabled.
ADVANCED VIEW BUTTON
You can open the Advanced View window by clicking on the mixer button at the bottom of the module’s main panel:
Advanced View: Mix
Adjusts stereo pan position and pass filter controls of the module’s output signal.
PAN
Controls the stereo pan position of the module’s output signal.
FILTER
Adjusts the center frequencies of high-pass and low-pass filters applied to the module’s output signal. Clicking and dragging on a node will adjust the center frequency of that filter. Clicking and dragging in the space below the two nodes will move both nodes at the same time.
Overview
Chorus is a modulation effect that can simulate the slight variations in timing and pitch that occur when multiple performers play or sing the same part. This effect applies a short delay to the input signal and modulates the delay time using an LFO. The modulation of delay time introduces slight pitch variations in the chorused signal. Chorus can be used to add subtle depth and movement to your voice. When using aggressive modulation settings, Chorus can be used to add a more synthetic sounding vibrato effect.
Controls
DEPTH
Adjusts the intensity of LFO modulation.
RATE
Adjusts the speed of LFO modulation.
WIDTH
Adjusts the perceived stereo image of the processed output.
MIX
Adjusts the balance of dry (unprocessed) and wet (processed) audio at the output of the effect. 0 = dry (unprocessed); 100 = wet (processed).
Controls
ENABLE
Enables/disables the Delay effect processing.
HOST SYNC
Enables/disables host tempo sync behavior for the Time control.
TIME
Determines the amount of time that will pass before each successive repeat of a dry audio input signal.
WIDTH
Adjusts the perceived stereo image of the processed signal.
FEEDBACK
Adjusts the amount of delayed signal that is fed back into the input of the delay.
MIX
Adjusts the balance of dry (unprocessed) and wet (processed) audio at the output of the effect. 0 = dry (unprocessed); 100 = wet (processed).
Overview
The Distort effect adds grit, attitude, and perceptual power to your vocal track. The Distort effect utilizes waveshaper distortion and several different algorithms to affect your vocal. A waveshaper creates complex harmonics in an audio signal by mapping the input signal (dry) to a new output signal (wet) based on the current “shape” of the waveshaper’s curve. There’s something unique and fun about the way a waveshaper sonically transforms a vocal, the most important areas of which are the tonal elements from 300 Hz to 900 Hz and the sibilant presence from 8 kHz to 15 kHz.
Controls
ENABLE
Enables/disables the Distort effect.
DRIVE
Increases the amount of overdrive applied to the selected distortion type.
TONE
Applies filtering to the distorted signal, effectively modifying the tone of the processed output.
TYPE
The Distort effect offers the following waveshapes:
MIX
Adjusts the balance of dry (unprocessed) and wet (processed) audio at the output of the effect. 0 = dry (unprocessed); 100 = wet (processed).
Overview
The Filter effect offers four filters with adjustable resonance specially selected with vocal processing in mind.
Controls
ENABLE
Enables/disables the Filter effect.
FREQ
Adjusts the center frequency of the filter.
RES
Adjusts the amount of emphasis applied to a narrow band of frequencies surrounding the center frequency of the filter.
TYPE
You can choose between the following 4 filter types:
| Name | Description |
|---|---|
| NY LP | A low pass filter that lends a warm, “buttery” quality to the low-end of a vocal fundamental. Based on an analog filter design originally developed in the 1960s in upstate New York. |
| NY HP | A high pass filter that enhances the high frequency presence of a vocal. Based on an analog filter design originally developed in the 1960s in upstate New York. |
| SCREAM | A very sharp resonant filter with a lot of amplification around the center frequency for aggressive peaks and overdrive. |
| COMBO | Combines both flat HP and LP filters in a single sweepable control. Moving it downward engages a low-pass filter, moving it up engages a high-pass filter. In the center neither filter is applied. |
MIX
Adjusts the balance of dry (unprocessed) and wet (processed) audio at the output of the effect. 0 = dry (unprocessed); 100 = wet (processed).
Overview
Ring modulation is an effect that multiplies the frequency content of two input waveforms and outputs a new waveform that includes frequency content from both input sources and it’s own unique frequency content. The output waveform contains partials (inharmonic frequency content) that are responsible for the metallic sound characteristic of ring modulation. VocalSynth’s Ring Mod effect can be used as a Tremolo effect by setting the Freq control to lower values.
Controls
ENABLE
What’s New in the iZotope VocalSynth 2 Serial Key Archives?
Screen Shot

System Requirements for IZotope VocalSynth 2 Serial Key Archives
- First, download the IZotope VocalSynth 2 Serial Key Archives
-
You can download its setup from given links:

iZotope VocalSynth 2 Serial Key Archives & Free Download

iZotope VocalSynth 2 Serial Key Archives& Kali Software Crack
