
Blue Mail for PC Windows 10/7/XP & MAC Software Download

Blue Mail for PC Windows 10/7/XP & MAC Software Download
Blue Mail for PC (Windows and Mac) Full Download Updated Version
↓↓
↓↓
Blue Mail for PC App Download New Version
Blue Mail for PC is a free mailbox application that works as a mail client giving you the opportunity to connect various emails into one place. This may be a very useful tool for email checking and usage because of the simple and well design interface. The application Blue Mail is very easy to use and our team highly recommends it. At this moment you can download it for Android and iOS from the links below:
Blue Mail on the Google Play
Blue Mail on the App Store
BlueMail by Blix a free, beautifully designed, universal email app, capable of managing an unlimited number of mail accounts from various providers, allowing for smart push notifications and group emailing while enabling personalization across multiple email accounts. TheBlue Mail For PC Downloadconnects directly to your mail server and is the perfect replacement for your stock email app.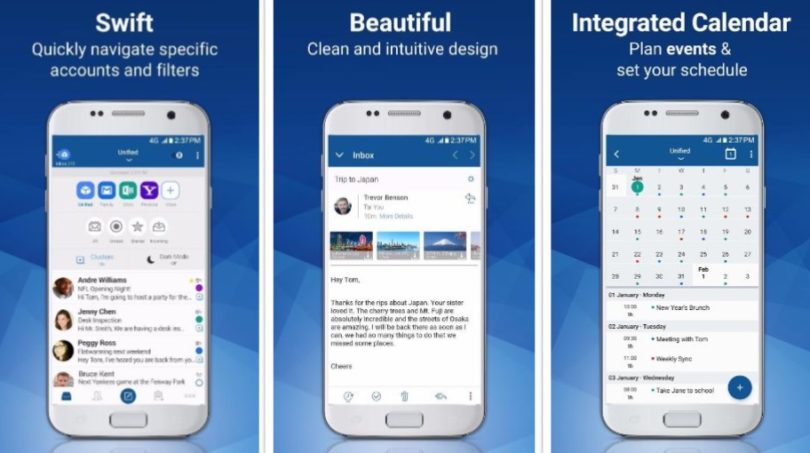
Download BlueMail for Windows
BlueMail is a free app and is famous for its ability to manage an unlimited number of email accounts from all providers. This allows for smart push notification while enabling personalization across multiple email accounts. BlueMail for Windows is the perfect replacement for your stock email app. BlueMail is the most popular app out there.
If You are Looking for Methods of ‘How to Install Blue for PC’ and not finding a suitable solution for it. Don’t worry, You just stepped into the right place. I assure you won’t regret coming here for the solution.
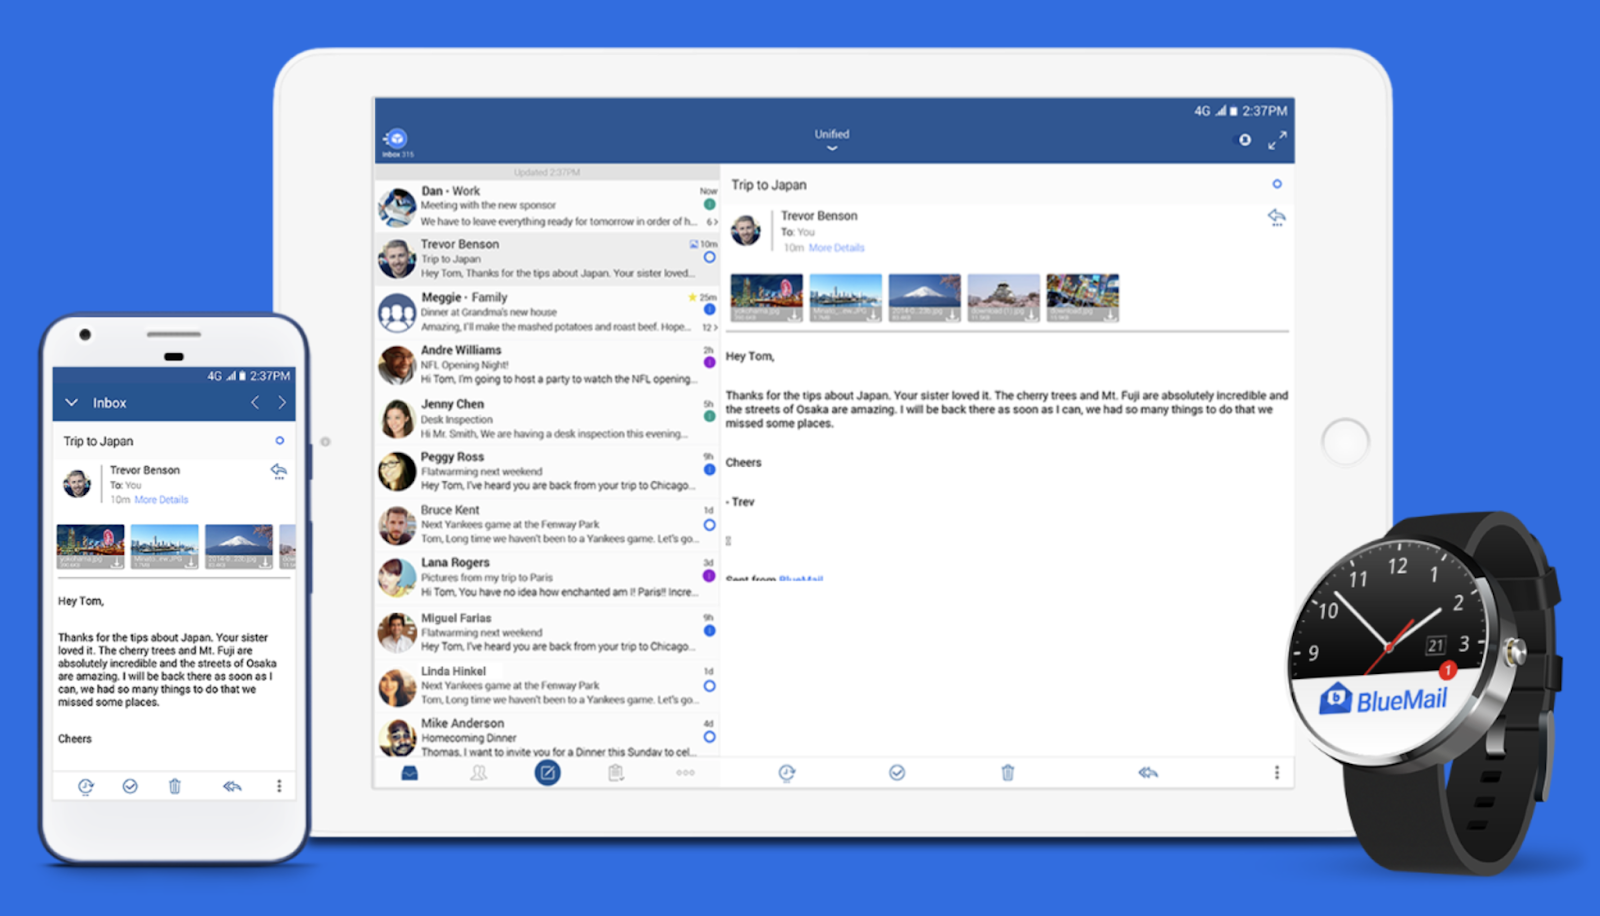
The mobile application that changed how millions of people handle their email, BlueMail, is coming to Windows. BlueMail for Windows comes feature packed with the tools that we have grown to love in the mobile app. With the power of the Desktop BlueMail is sure to impress even more.
Do you have multiple email accounts and are facing problems handling them?
Normally we have access with only one particular app supporting one website. The problem arises when we have our email accounts on other websites as well. Every problem has a solution and the best solution to your problem is Blue mail. Just read this article based on simple steps and I assure you, that you will never face this problem again. You may also read this Amino For PC Game
The reason why Blue Mail is so famous among people is that it completely a free app and can handle and manage email from all of the providers. One of the great things I like about blue mail is that it will allow you for smart push notification while enabling personalization across multiple email accounts. Bluemail is not only popular but a perfect replacement for the handling of your stock email app.
First I should tell you that this amazing app is only available for Android and iOS device. According to a statement issued by BlueMail, they are working on its production for windows also. But we don’t know how much time exactly will take to be available for Windows as well. That is why I have come up with a solution and will guide you how to Install BlueMail on your PC also.
How to download and run Blue Mail on your PC and Mac?
Blue Mail for Mac is a wonderful user-based app. Due to its amazing features, it is growing day by day. When it was created, an Alpha version of it was launched on Microsoft store. It was completely tested there. Realizing the massive popularity, Bluemail next version was also launched with the availability of new upgrades.
There are two methods to install Blue Mail App PC.
- Using Android Emulators
- Registering for the Beta Test.
We will first see the working of the first method. But before starting on the first method. You should be clear on How an Andriod Emulator works and What it actually does.
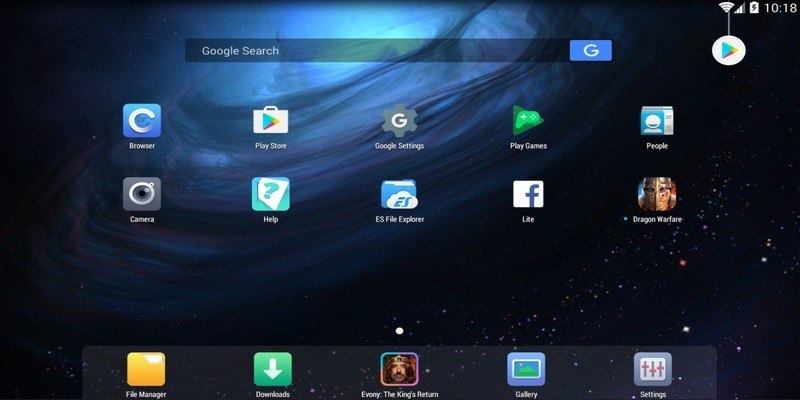
Android Emulator is a software that works as a Virtual Device that represents an Android device. The emulators allow you to use all the apps and games that you can play on your Android Apps. In the first method, I am going to tell you about some efficient and best emulator that you can use for this purpose.
7 Best Android Emulators that you can Use For Your Windows PC
- Nox App Player
- Remix OS Payer
- BlueStacks
- GenyMotion
- MEmu
- Andydroid
- Ko Player
Download BlueMail using BlueStacks on your PC
One of the most popular Android emulators is Bluestacks. It has a wonderful interface. It is a free software that will allow you to use Android apps on your PC Windows.
Go to Step-2 if you are using Windows 10
Step-1:
- First of all, you have to download The Bluestacks emulator for your computer.
- After the downloading is completed. Open the folder where you have downloaded your file and simply install it on your computer. It can be installed on Windows 10/8/8.1/7 or even Mac, so you don’t need to worry about the type of operating you are currently using.
- Firstly you need to download the Bluestacks for your Windows PC or laptop.
- The installation process may take some time, wait until it gets installed on your PC.
- Once bluestacks is installed, Launch it on your PC by opening bluestack. You have to sign in with your Google ID if you are using it for the first time.
- Now open the browser using Bluestacks, Remember that not from the desktop. Open it from bluestacks and in the search bar of the bluestack which is on the left corner, download the BlueMail APK file.
- Wait for the installation process to get complete.
Step-2 (If you are using Windows 10)
- You can see the APK icon which can easily be seen on the left sidebar of the bluestacks.
- When you type “Bluemail” in the search bar of the, you will see a list of apps.
- Double click the Bluemail APKClick the APK icon on the left sidebar of BlueStacks; you will see all the list of all the downloaded APKs
- Double click the Bluemail APK and Install it. You may also installl this Waze For PC Free Download
The installation process will soon start. After some time it will be installed on your computer.
Installing BlueMail for PC using Nox Player
Nox App player is one of the other Android emulators which will allow you to use Bluemail on PC. It has an amazing interface and I am pretty sure that you will love using it. Just follow these simple steps and use BlueMail for your PC.
- Go to Nox official website and download Nox app player there.
- Wait for the app to be downloaded.
- After it is installed. Open it.
- After you have opened it, you can see the google play store shortcut on the home page of the app. Click on it.
- Using the search bar of the Nox, search for the BlueMail.
- Select the BlueMail app from the list and click on the Install button. Launch it and use it.
Now you can easily Browse your Emails through Bluemail on your PC.
Use Bluemail on Windows using Andy Android Emulator
Android Emulator
In order to Install Andy Emulator on your computer, you must make it sure that the graphics version of your computer is upgraded to the latest version.
After making sure, Follow these steps to install it on your PC First of all, make sure that the graphics driver version of your computer is upgraded to the latest version and then start following steps mentioned down here.
- First of all download Andy Emulator ,
- Click on the file you have just downloaded and then follow on-screen instruction and install it.
- Open the emulator and then search for google play store app. In the search bar of google play store, search for BlueMail for Android.
- Just click on the install button and download it.

Method 2: Registering for the Beta Test
You can get the Beta version of BlueMail as soon as it is released because the BlueMail for desktop is still under development. You have to subscribe to get the beta version whenever it is released.
You have to :
- Subscribe to the beta.
- After signing up wait and you will receive an email.
- After these steps, Then enjoy blue mail app on your PC.

You will get a notification from Bluemail as you subscribe to the Beta version of it.I would suggest you wait for the beta version and whenever its version for PC is available it will be best to use it. The reason I am saying this is because emulators are quite slow as compared to the Beta versions of software and may also bring bugs into the software.
I have personally checked all of the above emulators and are trusted. You can download it from their official websites.
Author’s Opinion regarding the Bluemail for PC
The Bluemail for PC has very strong features, while considering the security purpose, priority is very high. No VPN or RDP are required for the said purpose. In some cases, emulator also working fine and middleware software also have the important role for smooth functioning. Therefore, author recommended the Bluemail for PC for your personal use and has no issue regarding the installation on PC (Windows and Mac). I hope you also use it without any trouble, if you have any issue, please mentioned in the email, we will provide you answer with proper solutions. Please like and share with other, we did lot of efforts during the collections of the software for your download.

Wireless Combo MK270
Reliable wireless combo
Reliable wireless combo
$ 29.99
Free shipping on orders over $29.00
Long-range wireless
Fast, reliable connection up to 10-meters with virtually no delays or dropouts thanks to Logitech Advanced 2.4 wireless technology.1
On-the-go mouse
Take this compact mouse anywhere your computer goes.
Long battery life
Go for months without changing batteries. On/Off switches help conserve battery use.
Advanced 2.4 GHz wireless
Work or play in more places. The wireless connection virtually eliminates delays, dropouts and interference and gives you a range of up to 10-meters range.1
Compact mouse
Take the mouse with you. This comfortable mouse fits easily into computer bags and pocket to travel with your computer.
Extended battery life
A 36-month keyboard and 12-month mouse battery life—plus on/off switches—means you can go for months without the hassle of changing batteries.2
Eight shortcut keys
Instant access to media controls—movies, music, Internet, e-mail, play/pause, volume and more—are one touch away.
Full-size keyboard
The full-size keyboard with number pad, directional keys, and nine F-keys is comfortable, convenient and built to last.
System Requirements
- Windows Vista®, Windows® XP, Windows 7, Windows 8, Windows 10
- USB Port
- Chrome OS™
Windows-based PC
Package Contents
- Keyboard
- Mouse
- Nano-receiver
- 2 AAA (keyboard) and 1 AA (mouse) batteries
- User documentation
Warranty Information
3-year Limited hardware warranty
Part Number
Looking for support for this product?
Get SupportHow to Make Windows 10 Look and Feel Like Windows 7
Windows 10 offers a number of benefits over its predecessors, including improved boot and wake-from-sleep times, the ability to run Universal apps, the Cortana voice assistant and Xbox game streaming. It even has a Start Menu, a key feature that is infamously missing from Windows 8. But what if you like the improved performance and features of Windows 10, but you prefer the look and feel of Windows 7? While you can't make everything look identical to Microsoft's old operating system, you can change many key elements, including the Start Menu, wallpaper and taskbar.
I. Install a New Start Menu
Windows 10 brings back the Start Menu . . . sort of. While there is a Start Menu, it's very different from the one in Windows 7 and you may not like the differences. Instead of providing a list of icons and folders, the new Start Menu has a set of flashy, but space-wasting, live tiles on its right side and a list of frequently used apps on the left side. You can add live tiles, but you cannot pin a simple icon to the left side like you could in Windows 7 and XP. Fortunately, you can install a third-party Start Menu that looks and functions the way you want it to. There are a couple of Windows 10-compatible Start apps out there, but we like Classic Shell, because it's free and very customizable.
1.
Download and install Classic Shell version 4.2.2 or higher. As of this writing is 4.2.2 is in beta and available for download from the Classic Shell forums. Earlier versions don't work properly with Windows 10.
2.
Deselect Classic Explorer and Classic IE during the install process. You can try those programs if you want, but we didn't find them particularly useful.
3.
Open Classic Start Menu settings. If Classic Shell is already running, you will see a Shell icon in the lower right corner and can right click it and select settings. Otherwise, you can search for "Classic Start Menu Settings."
4.
Check Show All Settings if it is not already checked.
5.
Navigate to the Start Menu Style tab and select Windows 7 Style if it is not already selected.
6.
Download the Windows 7 Start button image from this thread if you want your Start button to look authentic. There are several custom buttons available. Then navigate to the Start Button tab, select Custom button and browse to the image. If you don't see a Start Button tab, make sure Show All Settings is checked.
7.
Navigate to the Skin tab and select Windows Aero from the pulldown menu.
8.
Click Ok. Your Start Menu should look something like this.
II. Hide the Cortana / Search Box
On its taskbar, Windows 10 has a prominent search box which invokes Cortana when you click in it. While this box is actually quite useful, it doesn't exist in Windows 7 so you may want to get rid of it. Besides, if you install Classic Shell or another Start Menu replacement, that will come with its own built-in search box. To hide the Cortana box:
1.
Right click on the search box. A context menu appears.
2.
Select Hidden from the Cortana menu.
III. Get Rid of the Lock Screen
The Windows 10 lock screen you get when you boot up or wake from sleep looks attractive but wastes your time. You have to click or swipe to get rid of it, and then you still get hit with the login prompt. In Windows 7, you boot straight to login prompt and you can do the same in Windows 10 if you make a simple registry edit.
1.
Hit Windows +R to bring up the Run dialog.
2.
Type "regedit" and hit Enter.
3.
Go to HKEY_LOCAL_MACHINE\SOFTWARE\Policies\Microsoft\Windows in the registry tree.
4.
Right click in the right pane and select New > Key. A new key (looks like a folder) appears in the left pane.
5.
Rename the key to Personalization and select it.
6.
Right click and select New > DWORD (32-bit) Value in the right pane.
7.
Rename the new value to "NoLockScreen."
8. Double click on it, set the value to 1 and click Ok.
IV. Add Windows 7 Wallpaper
Nothing makes a computer look like Windows 7 more than using the default Windows 7 wallpaper with the bright blue background and the giant Windows logo in the middle.
1.
Acquire the Windows 7 wallpaper. Windows 10 doesn't come with the old wallpaper, but you can get it a couple of ways. If you still have access to a computer with Windows 7 on it, you'll find the wallpaper at C:\Windows\Web\Wallpaper\Windows\img0.jpg. You can also download the wallpaper from various places that have posted it online, including here.
2.
Right click on your desktop and select Personalize.
3.
Click the Browse button and select the wallpaper file.
V. Give the Window Bars Colors
Windows 10 allows applications to select their own title bar colors, but most programs don't have a custom color set and end up with a depressingly bland white bar. While you can't get back the transparent aero effect in title bars, you can make them show a nice Windows 7 blue. Here's how.
1.
Right Click on the desktop and select Personalization.
2.
Select Colors from the left pane.
3.
Toggle "Automatically pick an accent color from my background" to off if you want to choose a custom color. Or leave it / toggle it to on to have it change colors based on your wallpaper.
4.
Select a color if you chose to pick a custom color. We recommend the dark blue in the second row for the most Windows 7-like shade.
5. Make sure "Show color on title bar" and "Show color on Start..." are toggled to on.
VI. Replace Edge with Internet Explorer
Windows 7 came with Internet Explrorer as its default browser, with the IE icon pinned to the taskar. If you don't like Edge browser, Chrome or Firefox, you can easily go back to using Internet Explorer as your default browser in Windows 10.
1.
Right click on the Edge browser taskbar icon and select Unpin.
2. Search for Internet Explorer in the search bar. By the time you type Internet, you should see the icon for it.
3.
Right click on the Internet Explorer icon and select Pin to Taskbar. The IE logo will appear on your taskbar. You might want to drag it to the left so it sits next to the Start button.
4.
Launch Internet Explorer.
5.
Select Internet Options from the menu.
6.
Navigate to the Programs tab and click "Make Internet Explorer the default browser." A new window opens with a list of programs.
7.
Select Internet Explorer in the left pane and click "Set this program as default."
8. Click Ok.
Customize Windows 10
What’s New in the Blue Mail for PC Windows 10/7/XP & MAC Software Download?
Screen Shot

System Requirements for Blue Mail for PC Windows 10/7/XP & MAC Software Download
- First, download the Blue Mail for PC Windows 10/7/XP & MAC Software Download
-
You can download its setup from given links:

Blue Mail for PC Windows 10/7/XP & MAC Software Download & PC Free Download

Blue Mail for PC Windows 10/7/XP & MAC Software Download& Apps for Laptop & PC Free Download
